 Stamp Tool
Click Stamp Tool to add stamps to documents:
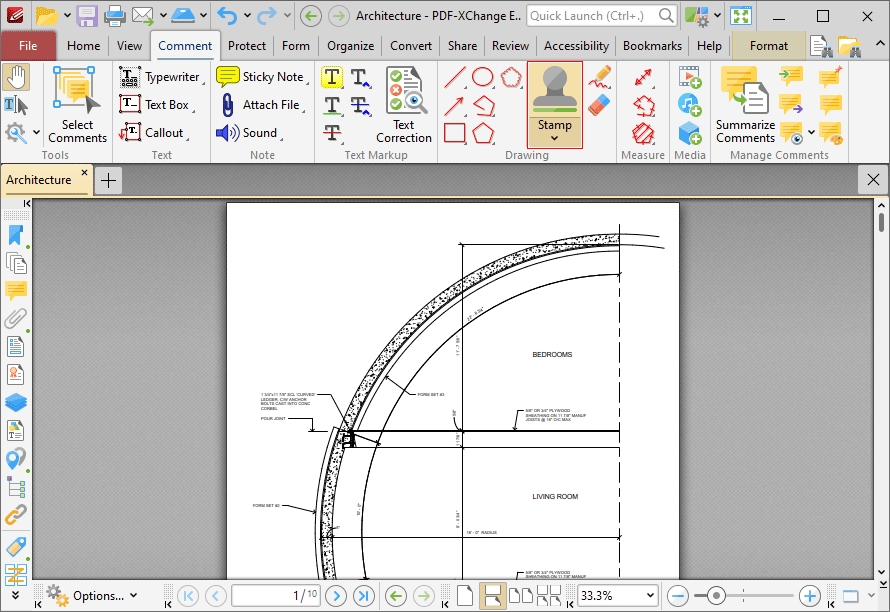
Figure 1. Comment Tab, Stamp Tool
Note that this button is divided into two sections. Click the dropdown menu arrow to view/select available stamps, as detailed in (figure 6) below. Click the icon to enable the Stamp Tool. When the Stamp Tool is enabled, the active stamp will be displayed beneath the pointer. Move the pointer to the desired location and then click to add stamps:
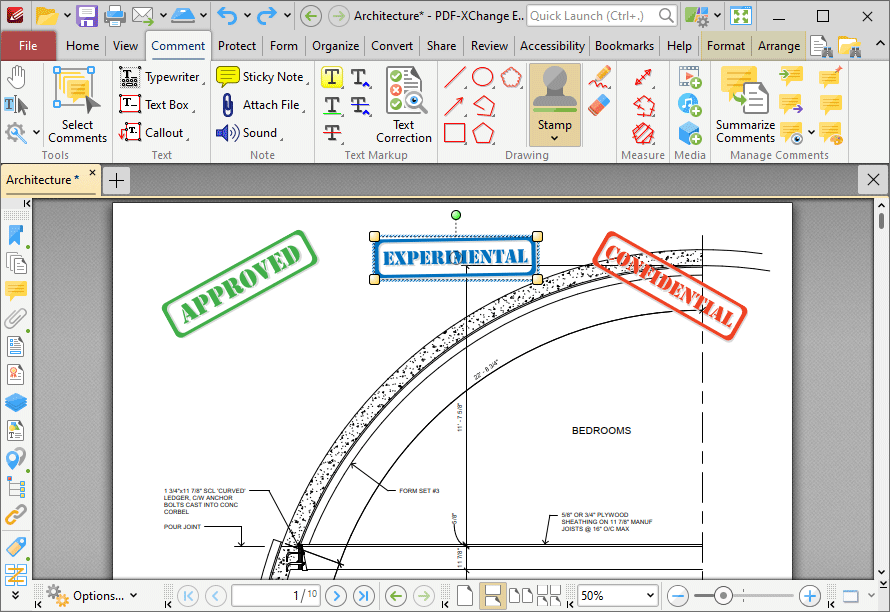
Figure 2. Stamp Tool Example
Click to select stamps, as detailed in the central stamp in the image above. Selected stamps can be edited as follows:
•Click and drag the yellow control points to resize stamps. Please note that stamp proportions are constrained.
•Click and drag to reposition stamps.
•Click and drag the green control point to rotate stamps. Hold down Shift to rotate at increments of fifteen degrees.
•Use the arrow keys to reposition stamps. Hold down Shift to move at an increased increment.
•Use the editing aids detailed here to assist in the precise placement of stamps.
•Right-click stamps for further options. See here for an explanation of these options.
•Press Ctrl+' to open the Properties pane for selected annotations and view/edit properties:
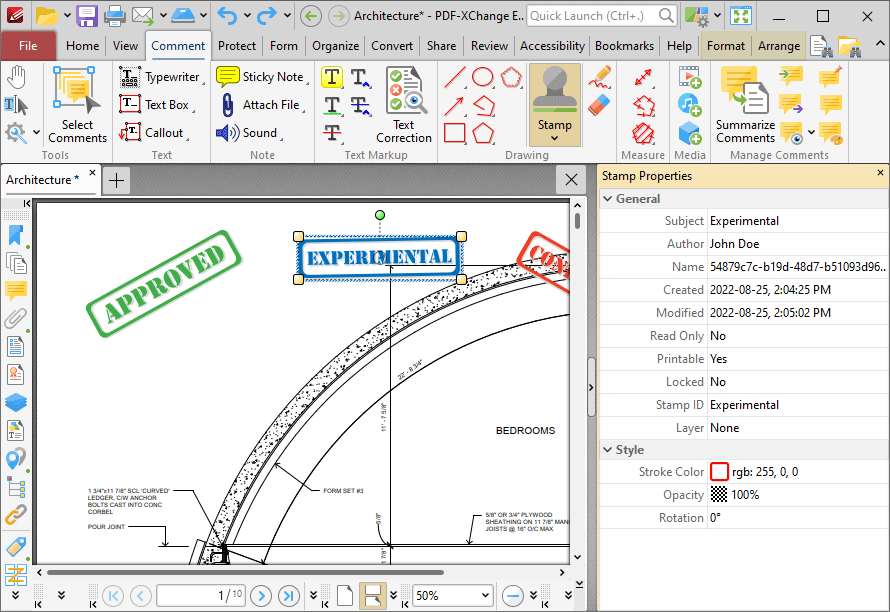
Figure 3. Stamp Tool, Stamp Properties Pane
•Subject is the name of the stamp annotation, as referenced in the Comments pane.
•Author is the name of the user that created the stamp annotation.
•Name is the unique name of the stamp annotation, as referenced within the application.
•Created is the date and time at which the stamp annotation was created.
•Modified is the date and time at which the stamp annotation was last modified.
•Read Only is the read only status of the stamp annotation. If this property is enabled then users cannot interact with the annotation. Please note that it is necessary to use JavaScript to change the value of this property.
•Printable is the print status of the stamp annotation. If this property is enabled then the annotation is printed with the document. If this property is not enabled then the annotation is not printed.
•Locked is the locked status of the stamp annotation. If this property is enabled then the annotation cannot be deleted and its properties (including its position and size) cannot be modified by users.
•Stamp ID is the name of the icon used to display the stamp.
•Layer determines the optional content layer to which the stamp annotation belongs. Further information about layers is available here.
•Stroke Color determines the stroke color of the stamp annotation.
•Border Style determines the style of the stamp annotation.
•Border Width determines the width of the stamp annotation.
•Opacity determines the level of transparency in the stamp annotation.
•Blend Mode determines how stamp annotations blend with overlapping content. These options are explained here.
•Rotation determines the degrees of rotation of the stamp annotation.
Note that when the Stamp Tool is enabled, the Format tab is available and can be used to customize the default properties of stamp annotations:
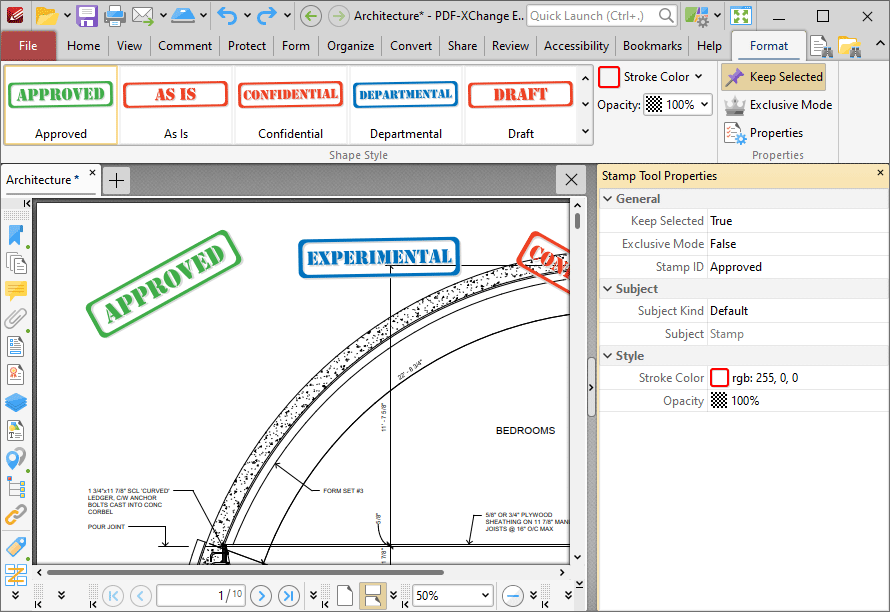
Figure 4. Format Tab, Stamp Tool
•Click options in the Shape Style group to select alternative default stamp annotation styles.
•Select an option in the Opacity dropdown menu to determine the level of transparency in stamps.
•Click Keep Selected to keep the Stamp Tool enabled and add multiple stamp annotations to the document. If this option is not enabled then PDF-XChange Editor will revert to the designated default tool immediately after creating one stamp annotation.
•Click Exclusive Mode to enable exclusive mode, which simplifies the process of using the Stamp Tool. When Exclusive Mode is enabled, the pointer ignores all interactive elements of documents other than base content. This makes it possible to create stamp annotations on areas that overlap with other content without the risk of accidentally selecting undesired items. When Exclusive Mode is disabled, the pointer recognizes and interacts with all underlying elements in the usual manner.
•Click Properties to open the Properties pane and view/edit Stamp Tool properties, as detailed above. Property definitions are detailed here.
•When stamp annotations are selected, the Pop-up group is available in the Format tab and can be used to interact with the pop-up note of the annotation:
•Click Open to open the pop-up note.
•Click Hide to hide the pop-up note.
•Click Reset Location to reset the location of the pop-up note.
•When stamp annotations are selected, the Arrange tab is also available and can be used to manipulate comments as detailed here.
Note that the Comment Styles Palette can be used to edit and save customized stamp annotation styles for subsequent use, and the Commenting preferences can be used to view/edit preferences for all comments.
Click the Stamp dropdown menu to view/select available stamps:

Figure 5. Comment Tab, Stamp Dropdown Menu
The Stamp Pane will open:
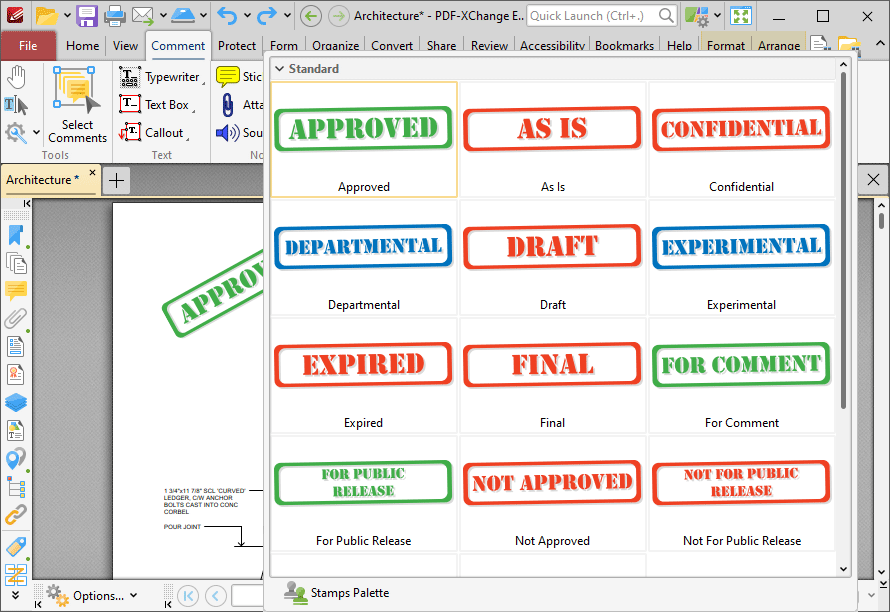
Figure 6. Stamps Pane
•Click to select stamps. They will then be displayed with the pointer. Click again to add stamps to the active document.
•Click Stamps Palette to open the Stamps Palette, which is a detached version of the Stamps Pane that contains editing options:
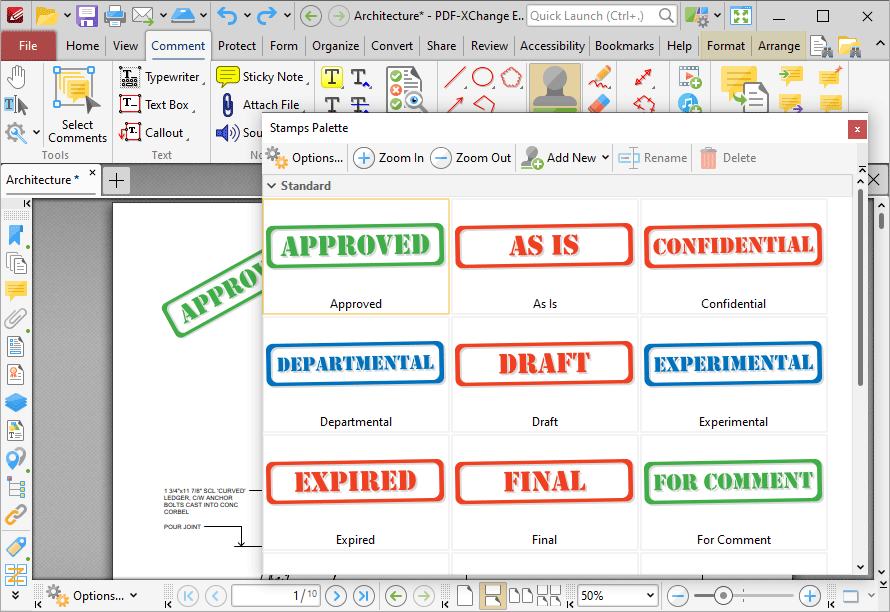
Figure 7. Stamps Palette
•Click Options to determine font and localization settings for stamps.
•Click the Zoom In and Zoom Out icons to zoom in on/out from available stamps.
•Click Add New for stamp creation options:
•Click Add New Stamp from File to create a stamp from a document saved on the local computer. The Open Files dialog box will open. Select a file and click Open. The file will be displayed in the Add New Stamp dialog box, as detailed in (figure 8).
•Click New Stamp from Selection to create a stamp from selected content in the active document.
•Click New Stamp from Active Document to create a new stamp from the active document.
•Click New Stamp from Clipboard to create a new stamp from the current clipboard content.
•Click Rename/Delete to rename/delete selected stamps. Note that the default stamps cannot be renamed/deleted.
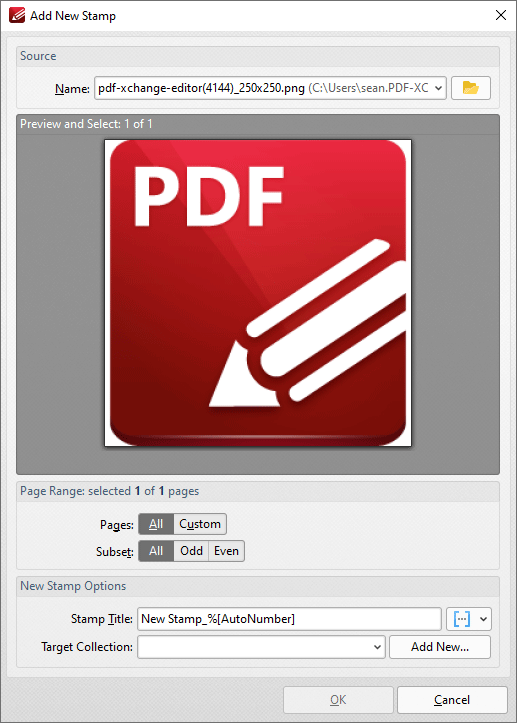
Figure 8. Add New Stamp Dialog Box
•Use the Name text box, or click the folder icon, to select a file to use as the stamp.
•The Page Range options determine the pages of the file that will be used for the stamp:
•Select All to specify all pages.
•Select Custom to specify a custom page range, then enter the desired page range in the adjacent number box. Further information about how to specify custom page ranges is available here.
•Use the Subset options to specify a subset of selected pages. Select All, Odd or Even as desired.
•Note that if more than one page is specified then a new stamp will be created for each page.
•Enter a name in the Stamp Title text box. Click the blue icon to include macros as desired.
•Use the Target Collection menu to determine the collection in which the new stamp will be stored.
•Click Add New to create a new stamp collection.
Click OK to create new stamps.
Please note the following:
•Images are usually in raster format and will pixellate with high levels of zoom. Therefore it is advisable to create stamps from presized images. Note that vector-based images do not experience this issue.
•If a transparent background is desired for stamps then a suitable image format must be used. The formats *.gif and *.png support transparency but *.jpg and *.pdf do not. N.b. Microsoft Paint does not handle *.png transparency well, but most modern graphics programs are compatible with *.png transparency. GIMP is one such program, and a free download of GIMP is available here.
•PDF files that contain transparent images/objects without backgrounds (such as scanned signatures) can also be used to create transparent stamps. Empty space on the page will be ignored in these cases.
If you are using PDF-XChange Editor Plus then the additional features below are also available:
Add Dynamic Elements to Stamps
Follow the steps below to add JavaScript to stamps:
1. Move to the Stamps Palette.
2. Click Add New Stamp from File:

Figure 9. Stamps Palette, Add New Stamp from File
3. Select the desired file, then follow the steps outlined beneath (figure 8) to create and save a new stamp.
4. Close PDF-XChange Editor.
5. Open the file that contains the stamp. Note that the default folder is %appdata%\Tracker Software\PDFXEditor\3.0 and all custom stamps are stored in the same file.
6. Move the file to the desktop. (This is a necessary step due to encoding parameters - if it is not included then the changes cannot be saved).
7. Open the file in PDF-XChange Editor.
8. Use the Form tab to add a text field to the stamp. (If you want the borders of the text field to be invisible then set the stroke color to None. The stroke color property can be edited in the Properties pane when the text field is selected).
9. Click Select Fields in the Form tab then right-click the text field and click Properties in the submenu. The Properties pane will open.
10. Scroll down to the Value Calculation property, then select Custom Action in the Calculation dropdown menu. The entry 'Calculate action / Run a JavaScript' will appear at the bottom of the Properties pane:
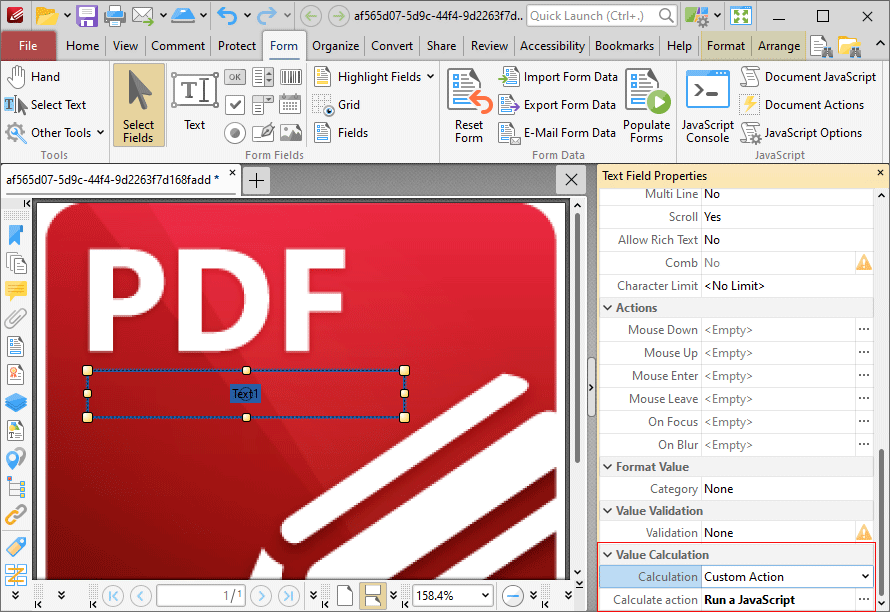
Figure 10. Dynamic Stamp Creation
11. Click the ellipsis icon (three dots) on the right of the 'Calculate action / Run a JavaScript' property. The Edit Action: "Run a JavaScript" dialog box will open.
12. Enter the desired JavaScript and click OK.
13. Save the file and close PDF-XChange Editor.
14. Return the stamp file to its original destination folder. The updated stamp will then be available in the specified stamp collection.
For example, entering the following JavaScript returns the time and date when the stamp is added to the document:
var d = new Date;
event.value = util.printd("yyyy/mm/dd/ HH:MM:ss", d);
Please note that form content is evaluated immediately before stamps are placed and flattened immediately after they are placed. The software will recognize it as a stamp, as opposed to a form field, despite the fact that it includes form field elements. Note that only the text field and barcode form fields are compatible with the process of creating dynamic stamps.
Add Numbering to Stamps
Follow the steps below to add numbering to stamps:
1. Use the steps detailed above to create a dynamic stamp and enter the following JavaScript at step twelve:
if (event.source.forReal && (event.source.stampName == "TCS9kAUOm4Abn56QZCOZE3"))
{
var counter = 0;
if (typeof event.source.source.info.stampCounter != undefined)
{
counter = event.source.source.info.stampCounter;
}
counter++;
event.source.source.info.stampCounter = counter;
event.value = counter;
}
else
{
event.value = 1;
}
2. Save the file and close PDF-XChange Editor.
3. Return the stamp to its destination folder. (It should have been moved to the desktop at step six of the process - see steps for adding dynamic elements to stamps, above).
4. Open PDF-XChange Editor and create a new document.
5. Place the stamp in the new document and select it.
6. Press Ctrl+J. The JavaScript Console will open. Enter the following JavaScript:
this.selectedAnnots[0].AP
7. Click Run in the JavaScript Console.
8. An alphanumeric string will appear in the lower section of the JavaScript Console. Copy this string to the clipboard.
9. Close PDF-XChange Editor.
10. Move the stamp from its destination folder to the desktop.
11. Open PDF-XChange Editor and open the stamp.
12. Click Select Fields in the Form tab, then select the text field of the stamp.
13. Press Ctrl+' to open the Properties pane.
14. Under the Value Calculation property, use the menu to select Custom Action. The entry Calculate action / Run a JavaScript will appear at the bottom of the Properties pane.
15. Click the ellipsis icon on the right of the Calculate action / Run a JavaScript property. The Edit Action: "Run a JavaScript" dialog box will open.
16. Replace the alphanumeric string on line one of the JavaScript Console with the alphanumeric string in the clipboard.
17. Save the file and close PDF-XChange Editor.
18. Move the file from the desktop to its original folder. The stamp will then feature incremental numbering when it is placed into documents.
A complete list of JavaScript-supported actions is available here.
Please note that there are some limitations to the JavaScript functionality available for dynamic stamps. Stamp files do not execute JavaScript in the same manner as PDF files, and functions and variables cannot be defined in a document script. Calculation scripts of the field placed in stamps are the only scripts that are guaranteed to work, and everything that is necessary to execute the script must be present within it in order for it to operate as intended.