 Form Tab
When the Form tab is selected, the following options are available:
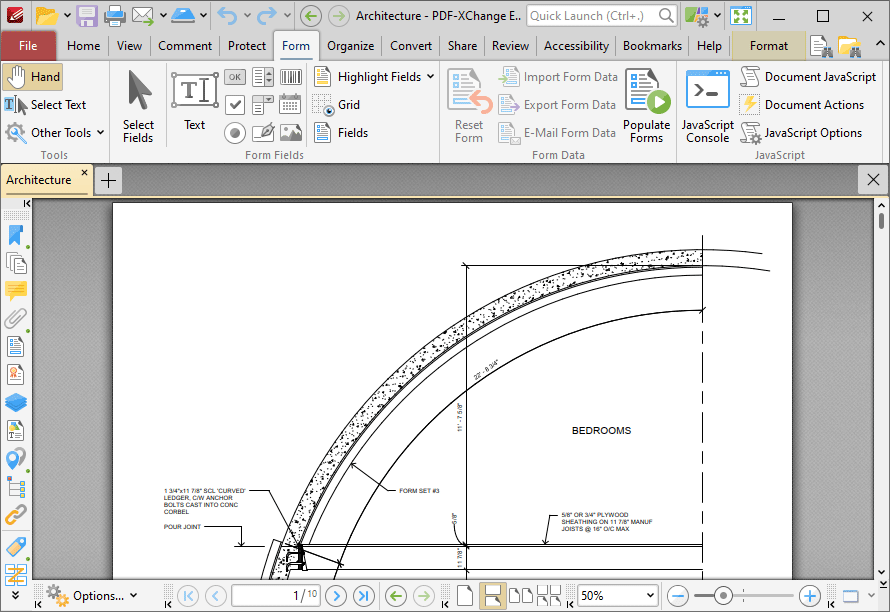
Figure 1. Form Tab
The options in the Form tab are used to create and edit form fields, form data, and JavaScript. There are four groups in the Form tab:
Tools
The Tools group contains shortcuts to tools and other features:
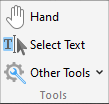
•The Hand Tool is used as a basic scrolling device and navigation aid when browsing through documents. Click to enable the Hand Tool, then click and drag the page in the desired scrolling direction in order to browse through documents. Further information about the Hand Tool and its settings is available here.
•The Select Text Tool is used to select base-content text. Click to enable the Select Text Tool, then click and drag the pointer to select text. Double-click to select words, triple-click to select paragraphs and quadruple-click to select all text on the current page. Right-click selections for editing options, as detailed here. Note that the default setting of the Select Text Tool results in it selecting entire lines of text. If you instead want to select a custom area of text, such as text that is located over several lines at the center of a larger block of surrounding text, simply press and hold the Alt key and then select the desired text. Additionally, please note that when text is copied from PDF documents and pasted into applications/locations outside of PDF-XChange Editor (such as Microsoft Word) additional page breaks may appear. This is a recognized issue with PDF documents. The Edit Content Tool should be used instead of the Select Text Tool in order to avoid this issue when copying text.
•Click the Other Tools dropdown menu to view/select additional tool options:
•The Select Comments Tool is used to select and edit comments. Click to enable the Select Comments Tool, then click to select comments. Click and drag to select multiple comments. Selected comments can be edited, as detailed here.
•The Snapshot Tool is used to take screenshots of pages/selected page content. Click to enable the Snapshot Tool, then click or click and drag to take snapshots. Further information about this tool is available here.
•The options in the Clipboard dropdown menu is used to interact with the current content of the clipboard. Click the dropdown menu to cut/copy/paste clipboard content.
•The Find feature is used to Find or Search text, or to search the internet for text selected with the Select Text Tool in the current document.
Form Fields
The Form Fields group contains options for creating and editing form fields:
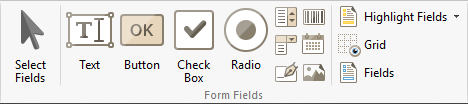
•Click Select Fields to select fields for editing or repositioning. Click a field to select it, or click and drag to reposition fields.
•Click Text to enable the Text Field feature, then click to add text fields. These fields are used to denote a space in which users can can enter text, such as their address or credit card details. Further information and instructions for this feature are available here.
•Click Button to enable the Button feature, then click to add buttons. Buttons allow users to trigger an event/action, such as opening a web link or playing a sound. Further information and instructions for this feature are available here.
•Click Check Box to enable the Check Box feature, then click to add check boxes. Check boxes allow users to make a binary choice between mutually exclusive options, such as yes/no answers. Further information and instructions for this feature are available here.
•Click Radio to enable the Radio Button feature, then click to add radio buttons. Radio buttons allow users to choose only one of a predefined set of options, such as when answering multiple choice questions. Further information and instructions for this feature are available here.
•Click ![]() List Box to enable the List Box feature, then click to add list boxes. List boxes allow users to select one or more items from a list of options contained within a static, multiple line text box, such as a list of months of the year. Further information and instructions for this feature are available here.
List Box to enable the List Box feature, then click to add list boxes. List boxes allow users to select one or more items from a list of options contained within a static, multiple line text box, such as a list of months of the year. Further information and instructions for this feature are available here.
•Click ![]() Barcode to enable the Barcode feature, then click to add barcodes. Barcodes translate form data into an encoded pattern that compatible devices can read and archive. Further information and instructions for this feature are available here.
Barcode to enable the Barcode feature, then click to add barcodes. Barcodes translate form data into an encoded pattern that compatible devices can read and archive. Further information and instructions for this feature are available here.
•Click ![]() Dropdown to enable the Dropdown feature, then click to add dropdown menus. Dropdown menus allow users to select only one value from a list of options contained within a static, multiple line text box, such as a list of nationalities. Further information and instructions for this feature are available here.
Dropdown to enable the Dropdown feature, then click to add dropdown menus. Dropdown menus allow users to select only one value from a list of options contained within a static, multiple line text box, such as a list of nationalities. Further information and instructions for this feature are available here.
•Click ![]() Date to enable the Date feature, then click to add date fields. These fields are a modified version of the Text Fields feature detailed above and feature date functionality by default.
Date to enable the Date feature, then click to add date fields. These fields are a modified version of the Text Fields feature detailed above and feature date functionality by default.
•Click ![]() Digital Signature to enable the Digital Signature feature, then click to add digital signature fields. These fields allow users to add digital signatures to documents. Further information and instructions for this feature are available here.
Digital Signature to enable the Digital Signature feature, then click to add digital signature fields. These fields allow users to add digital signatures to documents. Further information and instructions for this feature are available here.
•Click ![]() Image to enable the Image feature, then click to add image fields. These fields are a modified version of the Button feature detailed above, and feature JavaScript by default that enables the insertion of images to be submitted as form data.
Image to enable the Image feature, then click to add image fields. These fields are a modified version of the Button feature detailed above, and feature JavaScript by default that enables the insertion of images to be submitted as form data.
•Click Highlight Fields to highlight all form fields in the document. Alternatively, click the dropdown arrow to select manually which fields are highlighted.
•Click Grid to enable the grid feature, which is used to assist in the placement of form fields.
•Click Fields to show/hide the Fields pane, which displays a breakdown of form fields in the current document and can be used to edit fields.
Form Data
The Form Data group contains options that are used to manipulate form data:
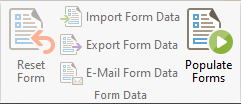
•Click Reset Form to reset all form fields in the current document.
•Click Import Form Data to import data into the forms of the current document. The Open Files dialog box will open. Select the desired file and click OK to import form data. Please note that the field names of forms must match in order for form data to be imported. For example, if there are three forms in the file from which data is imported that have the field names 'Text1', 'Text2' and 'Text3' respectively, then the current document must feature forms with the same field names in order for form data to import. The field name property can be viewed/edited in the Properties pane for forms, as detailed here.
•Click Export Form Data to export all data from the forms of the current document. The Save File dialog box will open. Enter a name for the new file in the text box, then select a file format from the Save as type dropdown menu and click Save to export the form data.
•Click Email Form Data to email the current document form data. The PDF-XChange Editor dialog box will open. Select the desired file format and then click OK to email the form data. PDF-XChange Editor will use the current email method as defined in the Send Mail preferences to email the form data. Please note that only the form data is sent, and not the form itself. Recipients of these emails can use the Import Form Data option detailed above to import the form data.
•Click Populate Forms to fill forms using data from a (*.csv) file, as detailed here.
JavaScript
The JavaScript group contains options that are used to edit JavaScript in the current document:
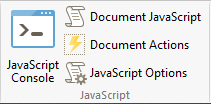
•Click JavaScript Console to open the JavaScript Console, which is used to add JavaScript to documents. This feature is detailed here.
•Click Document JavaScript to open the JavaScript category of the Document Properties dialog box, which can be used to create, edit or delete JavaScript, as detailed here.
•Click Document Actions to open the Actions category of the Document Properties dialog box, which can be used to enable JavaScript actions when documents close, save or print, as detailed here.