 Layers
Click Layers to open the Layers pane:
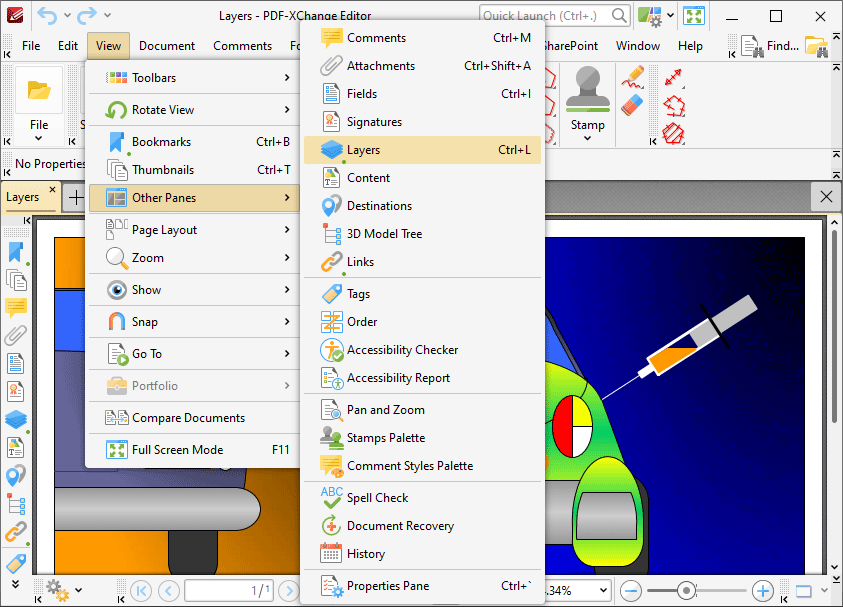
Figure 1. View Tab Submenu, Other Panes, Layers
The Layers pane displays information about document layers, which can be created using applications such as InDesign, AutoCAD, Visio and PDF-XChange Editor:
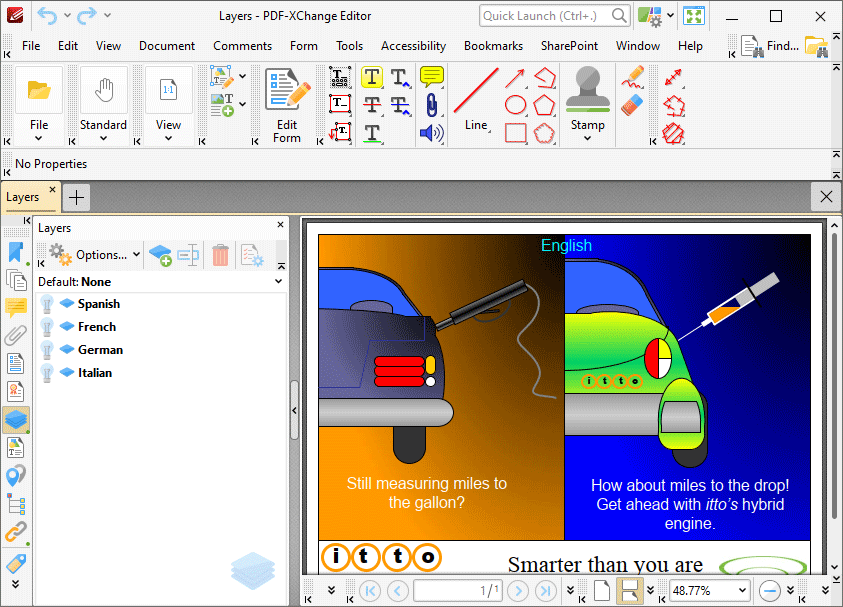
Figure 2. Layers Pane
Layers contain page content that can be displayed/hidden as desired. They are a useful feature in cases where documents need to feature a varying appearance depending on the intended audience. For example it is possible to create text-based layers that each feature a different language and fit over image-based content. The desired layer can then be enabled in order to match the language of the target audience:

Figure 3. Sample Layers Document, French Layer Enabled
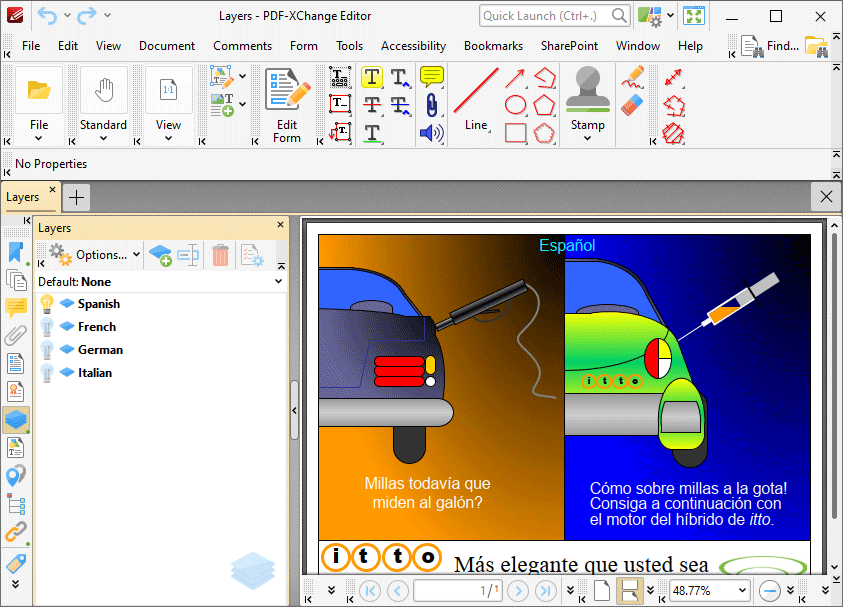
Figure 4. Sample Layers Document, Spanish Layer Enabled
Use the features in the Layers pane to perform the following operations:
Click ![]() Options to view options for layers, as detailed below.
Options to view options for layers, as detailed below.
Click ![]() Add New Layer to add a new layer to the current document, as detailed below.
Add New Layer to add a new layer to the current document, as detailed below.
Click ![]() Rename to rename selected layers.
Rename to rename selected layers.
Click ![]() Delete to delete selected layers.
Delete to delete selected layers.
Click ![]() to show/hide layers.
to show/hide layers.
Use the Default Layer dropdown menu to determine the default layer of documents:
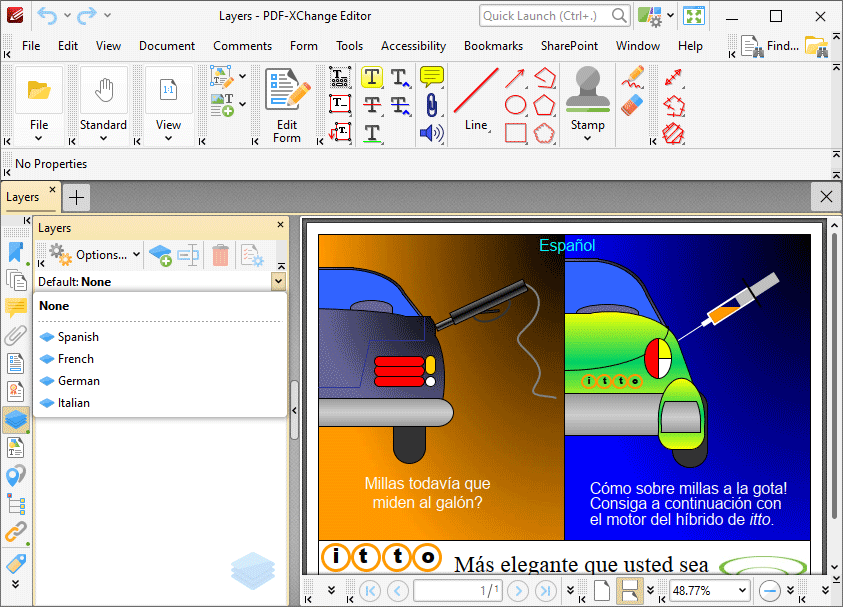
Figure 5. Layers Pane, Default Layer Dropdown Menu
When a default layer is specified all new content and comments added to the document will be added to this layer when the Layers pane is open. This enables you to save time and avoid the need to manually specify the layer to which new content and comments belong. Note that you can also drag and drop content/comments from their respective panes into the Layers pane to determine the layer to which they belong:
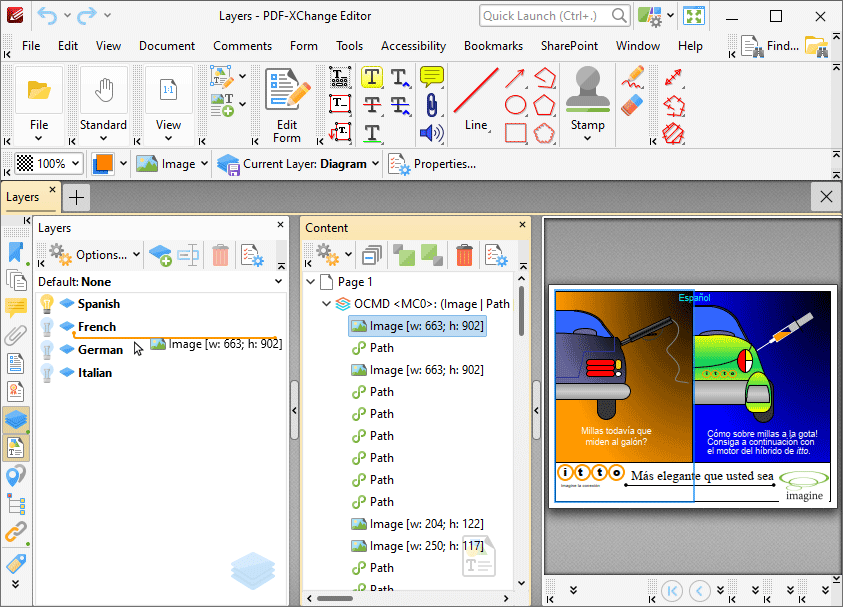
Figure 6. Moving Content from the Content Pane to the Layers Pane
Click ![]() Properties to view/edit the properties of selected layers. The Layer Properties pane will open:
Properties to view/edit the properties of selected layers. The Layer Properties pane will open:
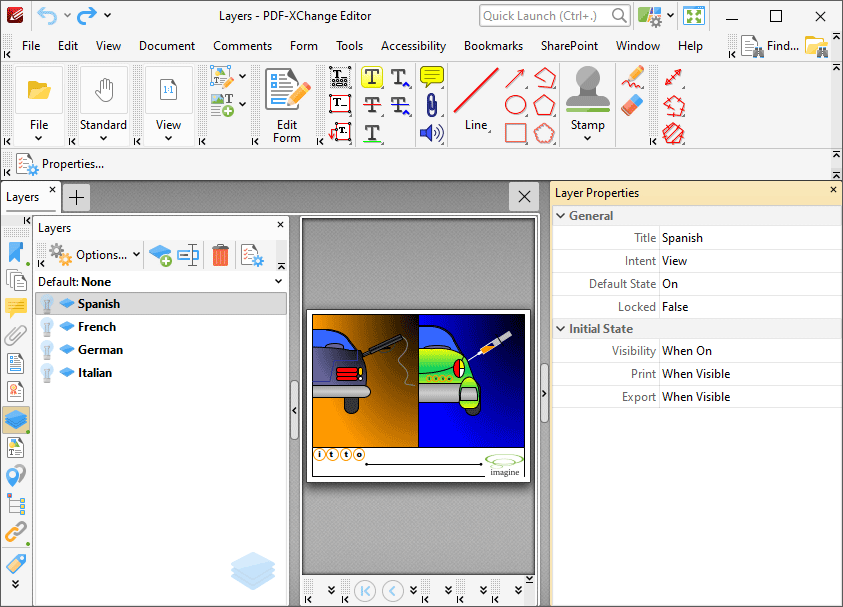
Figure 7. Sample Layers Document, Layer Properties Pane
•The Title property displays the title of layers as they appear in the Layers pane.
•The Intent property displays the intended use for layers:
•None means there is no specified intent.
•View means that the layer is intended for use as a viewing aid.
•Design means the layer is intended for use in understanding the design of the document.
•Design and View means both Design and View as detailed above.
•Please note that PDF applications may use the Intent property to determine whether or not layers are displayed.
•The Default State property displays the default (initial) state of layers when the document that contains them is opened,
•The Locked property displays the editable status of the layer.
•The Visibility property displays the visibility status of layers.
•The Print property displays the printing status of layers.
•The Export property displays the export status of layers. This property determines whether or not layers appear in resulting documents when the file is exported to an application/file format that supports layers.
Click ![]() Options to view layers options:
Options to view layers options:
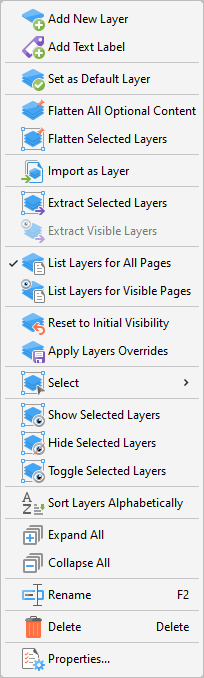
Figure 8. Layers Options
•Click Add New Layer to add a new layer to the current document. The Add New Layer dialog box will open, as detailed below.
•Click Add Text Label to add a text label to selected layers.
•Click Set as Default Layer to set the selected layer as the default layer. All content and comments added to the document will be added to this layer.
•Click Flatten All Optional Content to flatten optional content to the base content layer of the document.
•Click Flatten Selected Layers to convert selected layers into base content. Layers converted in this manner can then be edited using the Edit Content Tool.
•Click Import as Layer to import pages from a different document as a new layer, as detailed below.
•Click Extract Selected Layers to extract selected layers to a new document.
•Click Extract Visible Layers to extract visible layers to a new document.
•Click List Layers for All Pages to display layers on every page of the document.
•Click List Layers for Visible Pages to display layers on the pages currently visible in the document.
•Click Reset to Initial Visibility to revert all layers to their default state.
•Click Apply Layers Overrides to display all layers. This option includes layers not listed in the Layers pane.
•Hover over Select to view options for selecting a subset of items in the Layers pane:
•Click Select All to select all layers.
•Click Text Labels to select all text labels.
•Click Visible to select all visible items.
•Click Hidden to select all hidden items.
•Click Empty to select all items that do not belong to content items or annotations.
•Click Invert Selection to invert the current selection of items in the Layers pane.
•Click Show/Hide/Toggle Selected Layers to show/hide/toggle selected layers in the document.
•Click Sort Layers Alphabetically to sort layers into alphabetical order.
•Click Expand All to expand all layers in the Layers pane.
•Click Collapse All to collapse all layers in the Layers pane.
•Click Rename to rename selected layers.
•Click Delete to delete selected layers.
•Click Properties to view/edit the properties of the selected layer, as detailed above.
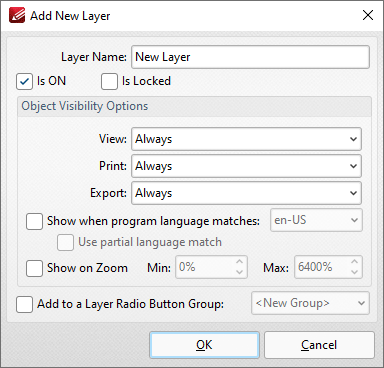
Figure 9. Add New Layer Dialog Box
•Enter the name of the new layer in the Layer Name text box.
•Select/clear the is ON box to set the default state of the layer to on/off.
•Select the Add to Layers Pane box to add the new layer to the Layers pane.
•Select/clear the Is Locked box to disable/enable subsequent users from changing the state of the layer.
•Use the Object Visibility Options dropdown menus to determine the visibility of the layer when the documents that contains it is viewed/printed/exported.
•Select the Show when system language matches box to show the layer when the application language matches a given language, then select the desired language in the adjacent dropdown menu.
•Select the Use partial language match to display the layer when there is a partial language match with the language specified. A partial language match occurs when the region of the language is the same as in the language specified but the locale is different. For example, if US English is specified in the Show when system language matches dropdown menu and the Use partial language match box is selected, then the layer will be displayed when the application language is identified as US English, United Kingdom English, South African English and all other derivatives of English listed in the dropdown menu.
•Select the Show on Zoom box to display the layer when the zoom function is used. Use the adjacent number boxes to specify the minimum and maximum levels of zoom at which the layer is displayed.
•Select the Add to a Layer Radio Button Group to add the layer to a Layer Radio Button Group. Layers contained in a radio button group are mutually exclusive - if one layer is enabled then the rest are disabled.
•Select the Add selected Comments to this layer box to add selected comments to the layer.
Click OK to save changes.
Import as Layer
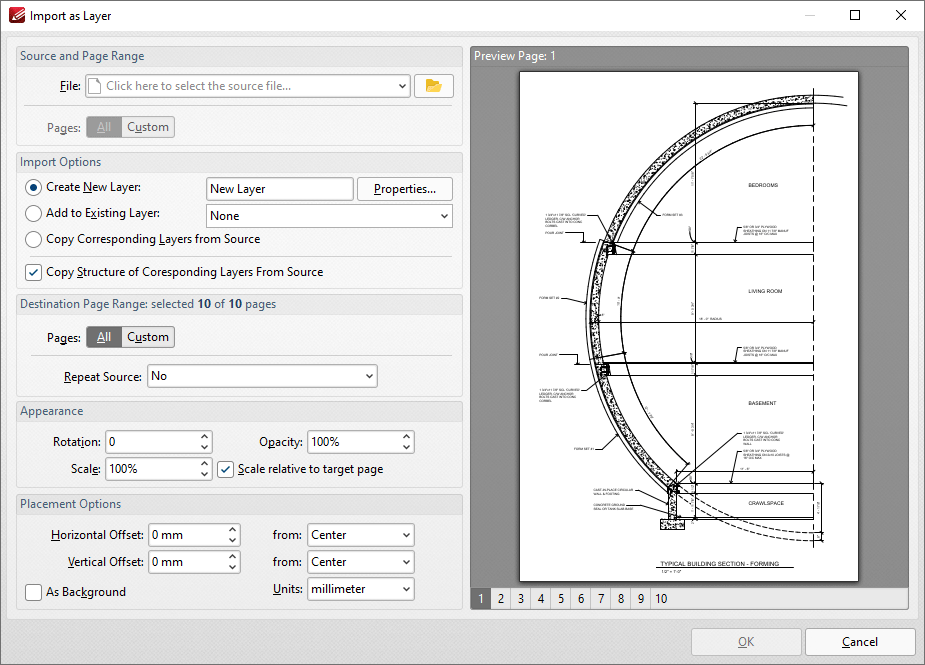
Figure 10. Import as Layer Dialog Box
•Use the File dropdown menu to select a file to import as a layer into the document.
•Use the Pages option to determine the pages used from the source document. Click All to use all pages, or Custom to specify a custom page range.
•Use the Import Options to determine import options for the new layer:
•Click Create New Layer to create a new layer for the imported content. Enter a name for the new layer in the text box and click Properties to determine layer properties, as detailed in (figure 9) above.
•Click Add to Existing Layer to add imported content to an existing layer, then selected the desired layer from the dropdown menu.
•Click Copy Corresponding Layers from Source to copy corresponding layers from the source document into the current document.
•Click Copy Structure of Corresponding Layers From Source to copy the layer structure from the source document into the current document.
•Use the Destination Page Range options to determine the page range into which layers are imported:
•Use the Pages option to determine the pages used from the source document. Click All to use all pages, or Custom to specify a custom page range.
•Use the Repeat Source dropdown menu to determine repeat options for the source document in cases where it contains fewer pages than the current document:
•Select No to disable the repeating of layers from the source document in the current document.
•Select Last selected page to repeat the last selected layer in the source document.
•Select Continuously repeat selected pages to repeat the layers selected in the source document repeatedly until they fill the current document.
•Use the Appearance options to determine the appearance of layers from the source document in the current document:
•Select an option in the Rotation dropdown menu to determine the rotation of the layers.
•Select an option in the Opacity dropdown menu to determine the opacity of the layers.
•Select an option in the Scale dropdown menu to determine the scaling of the layers.
•Use the Placement Options to determine the placement of layers:
•Use the Horizontal Offset number box to determine the horizontal offset of layers. Use the adjacent dropdown to determine the location from which the offset is made.
•Use the Vertical Offset number box to determine the vertical offset of layers. Use the adjacent dropdown to determine the location from which the offset is made.
•Use the Units dropdown menu to specify the units of measurement for offsets.
•Select the As Background box to import layers as a background.
Click OK to import layers.
Please note that it is necessary to save, close and reopen documents in order for some of the settings detailed above to be displayed.