 Add Digital Signature Fields to Documents
Digital signatures are used to demonstrate the authenticity of documents and increase their security. They can also be used to determine editing permissions for documents and/or utilize timestamp servers in order to further increase document security and integrity:
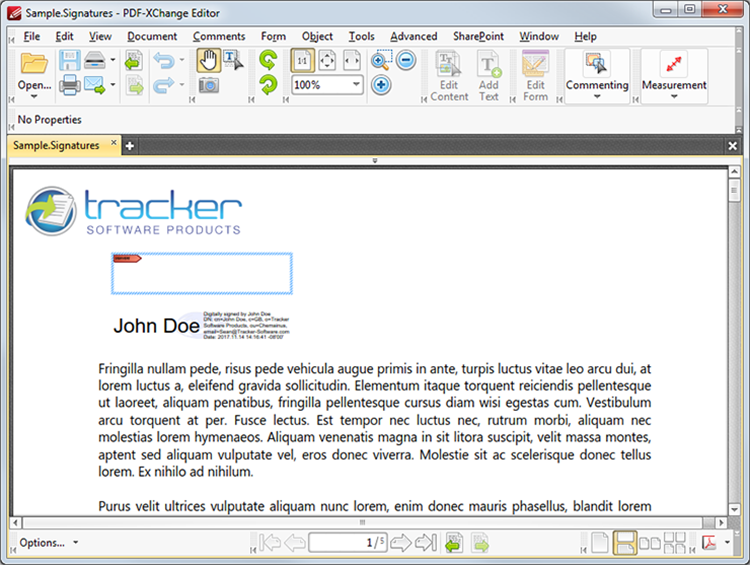
Figure 1. Sample Signature Fields, Unsigned (above) and Signed (below)
The functionality of PDF-XChange Editor enables a wide range of dynamic customization for signature fields, as detailed below. Click the dropdowns for further information:
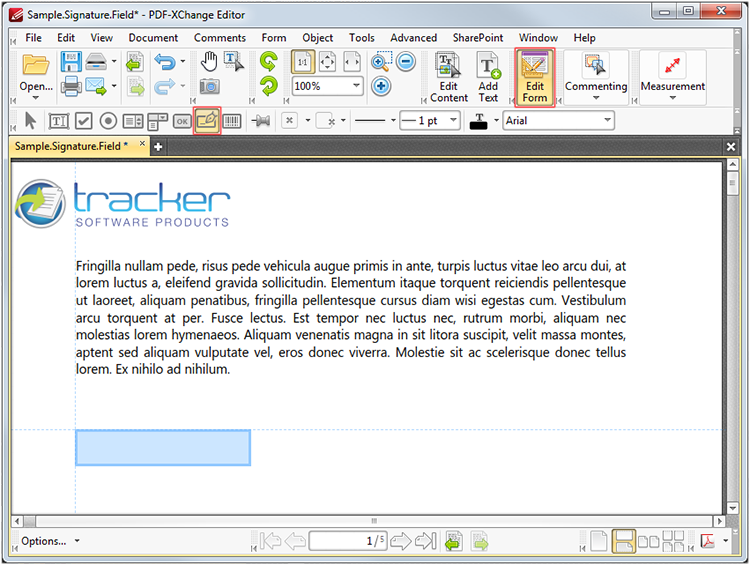
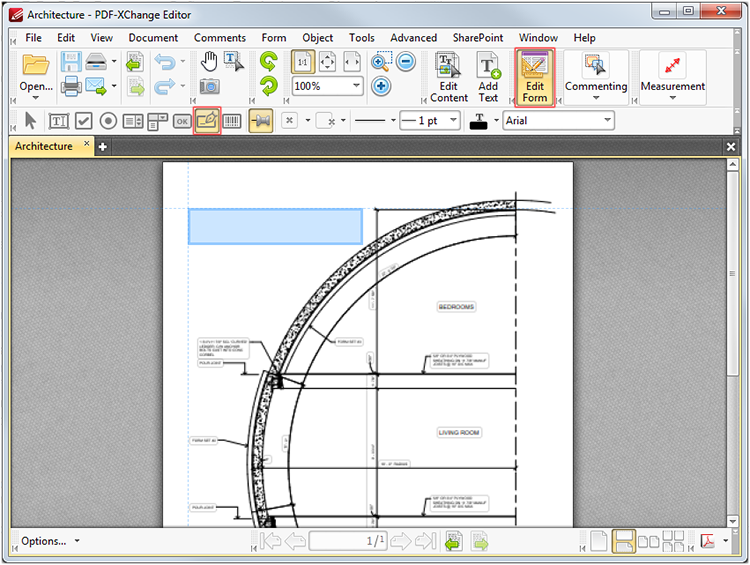
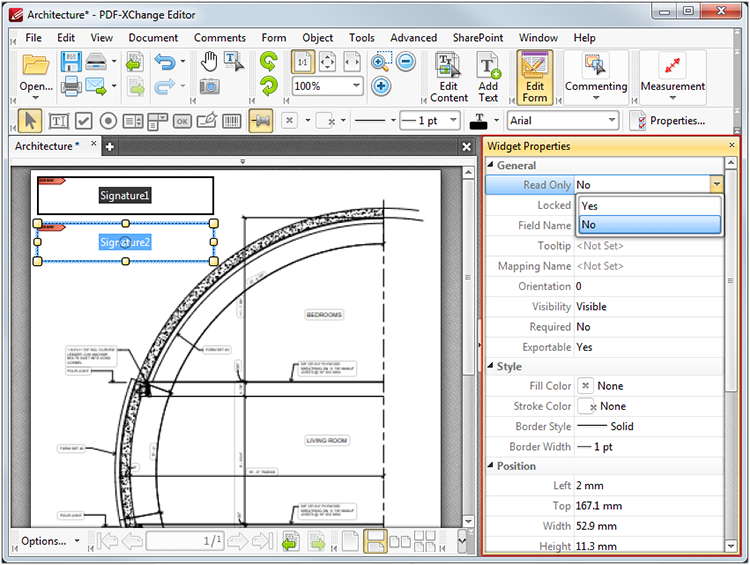
1. Click Edit Form, then click the Digital Signature icon in the Form Toolbar (these locations are highlighted in the image below). A blue rectangle will be displayed at the location of the pointer. This rectangle represents the signature field:
Figure 2. Active Signature Field Tool
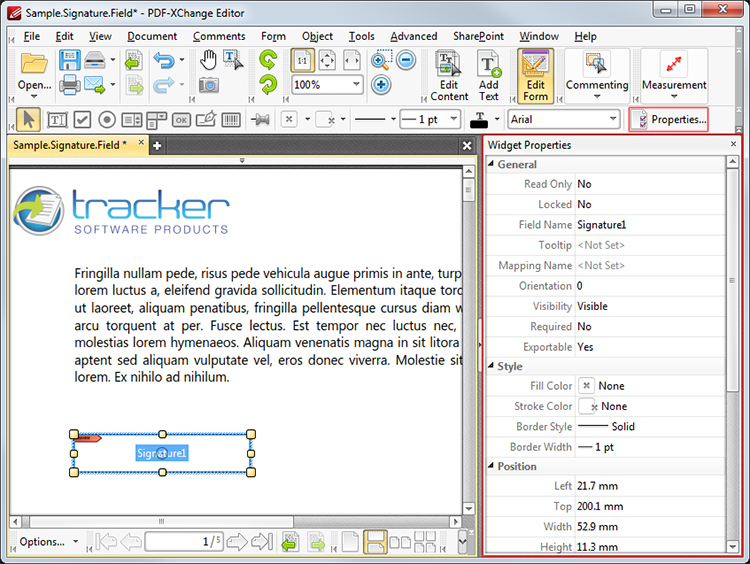
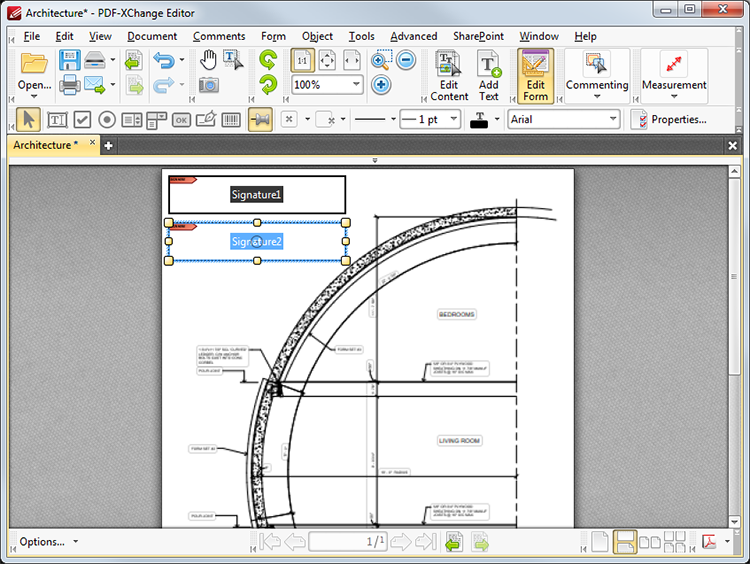
2. Move the rectangle to the desired location and then click to add the signature field to the document. (Use the editing aids detailed here to assist in the precise placement of signature fields). Added signature fields appear as below:
Figure 3. Added Signature Fields
•Click and drag the yellow control points to resize signature fields. •Use the options in the Properties Toolbar to determine the style and appearance of signature fields: •Fill Color determines the color used to fill signature fields. •Stroke Color determines the border color of signature fields. •Border Style determines the style of signature field borders. •Border Width determines the width of signature field borders. •Text Color determines the color of text in signature fields when they are signed. •Font determines the font of text in signature fields. •Properties launches the Widget Properties pane, which enables the customization of additional elements of signature fields.
|
The following example will detail the creation of a signature field that displays a tooltip when the pointer is hovered over it, and creates a bookmark for the current page when it is clicked:
1. Click Edit Form, then click the Barcode icon in the Form Toolbar (these locations are highlighted in the image below). The blue rectangle that represents the signature field will be displayed:
Figure 8. Active Barcode Tool
2. Click to add the signature field, then click Properties in the Properties Toolbar to open the Widget Properties pane:
Figure 9. Active Button Tool, Widget Properties Pane
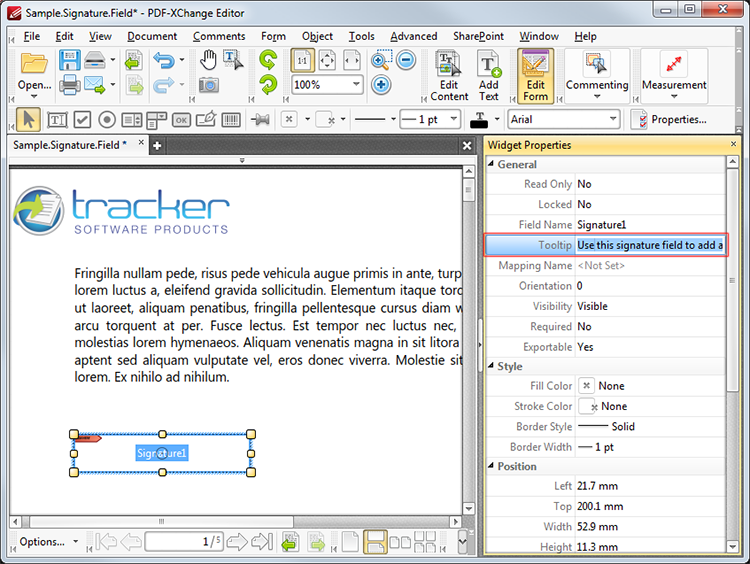
3. Click the Tooltip property in the Widget Properties pane and enter the desired text for the tooltip:
Figure 10. Widget Properties Pane, Tooltip Property
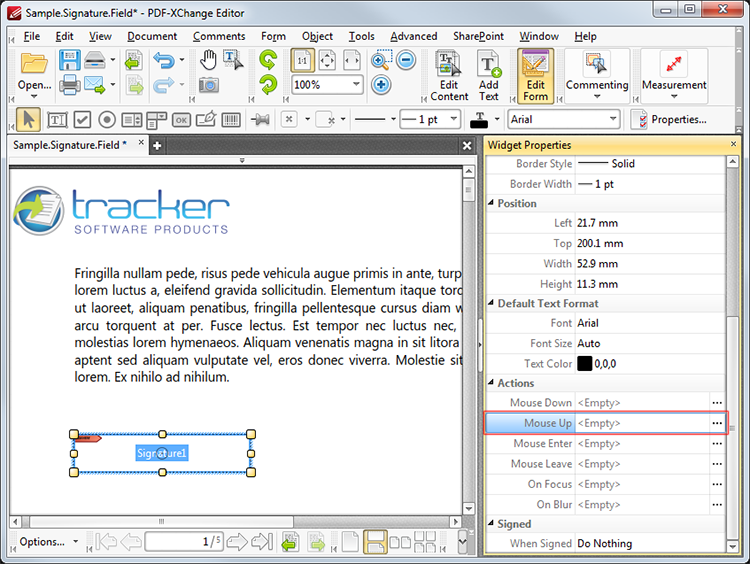
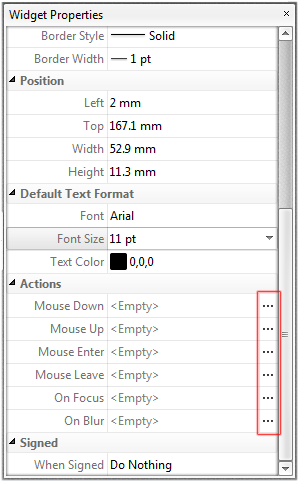
4. Scroll down the Widget Properties pane to the Actions properties and click the ellipsis icon on the right of the Mouse Up property:
Figure 11. Widget Properties Pane, Mouse Up Property
The Edit Action List dialog box will open.
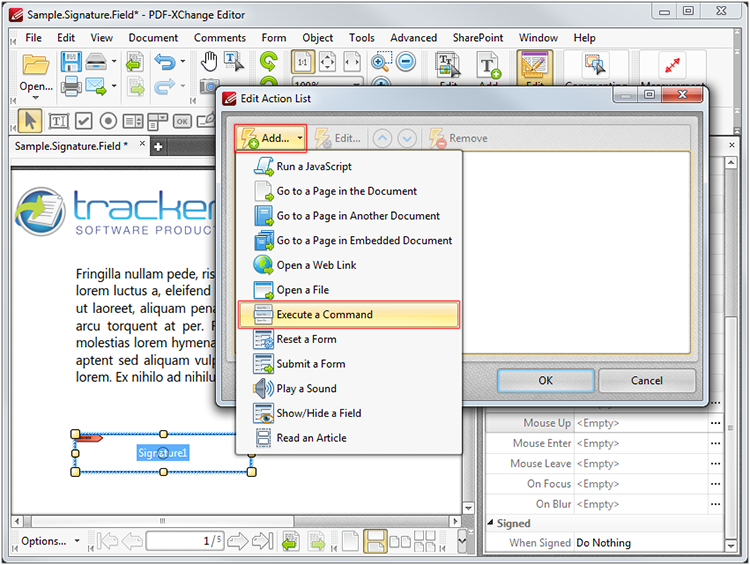
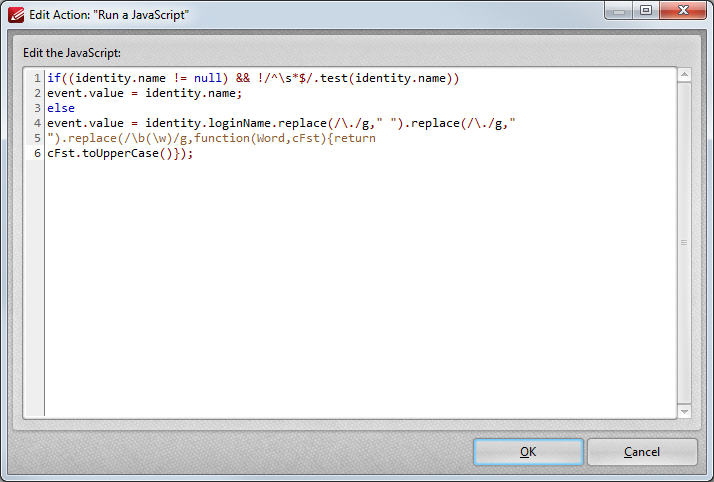
5. Click Add in the Edit Action List dialog box and then click Execute a Command in the dropdown menu:
Figure 12. Edit Action Dialog Box, Execute a Command
The Add Action: "Execute a Command" dialog box will open.
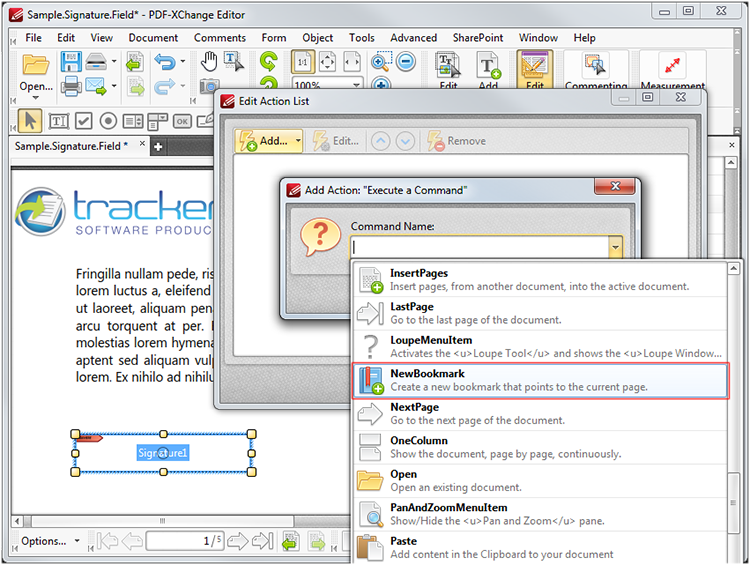
6. Click the dropdown menu, then scroll down to and click the NewBookmark command:
Figure 13. New Bookmark Command
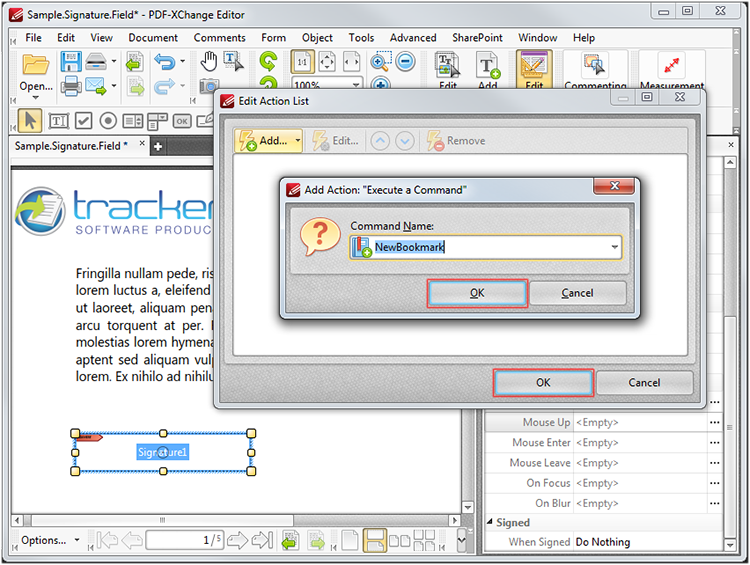
7. Click OK in both open dialog boxes:
Figure 14. Open Dialog Boxes
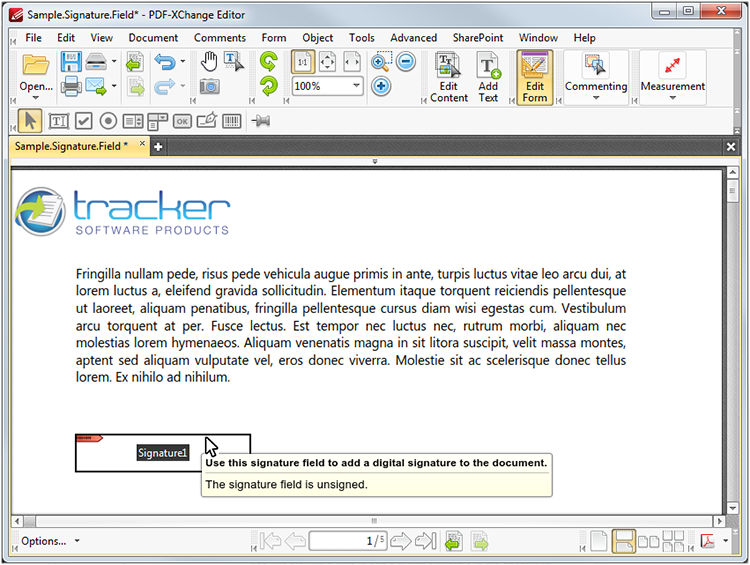
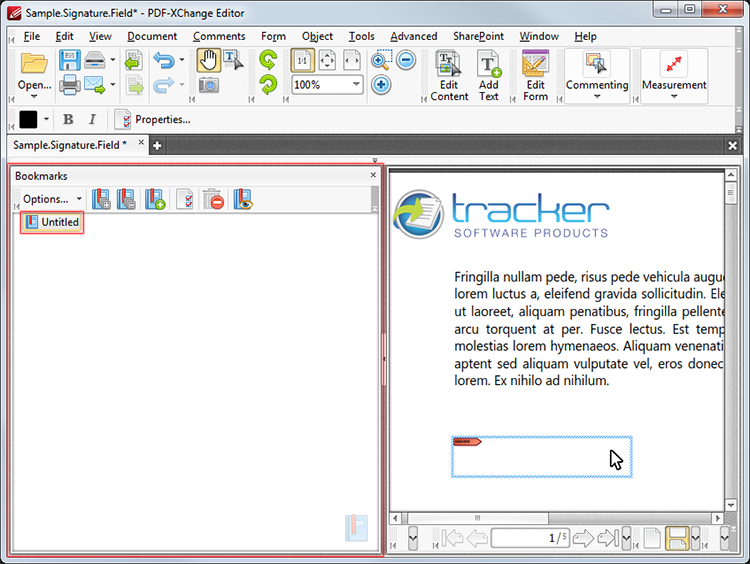
The signature field is then complete. The tooltip entered at step three will be present when the pointer is hovered over the signature field:
Figure 15. Active Tooltip
A new bookmark is created for the current page when the signature field is clicked:
Figure 16. New Bookmark Created |