 Convert Files to PDFs
The Convert Files to PDF action creates PDF documents from documents of other formats. Please note:
•This action is intended for use with files that contain both text and images. Use the Create PDF from Text action to create PDF documents from text files and the Create PDF from Images action to create PDF documents from image files.
•This action creates a new PDF document from each input file. Use the Split/Merge Documents action to create a single PDF document from multiple input files.
•This action must be ordered after the Choose Input Files action in the Tool Actions Sequence or the tool will not run.
•A complete list of supported file formats is available here.
The Convert Files to PDF action contains the following customizable parameters:
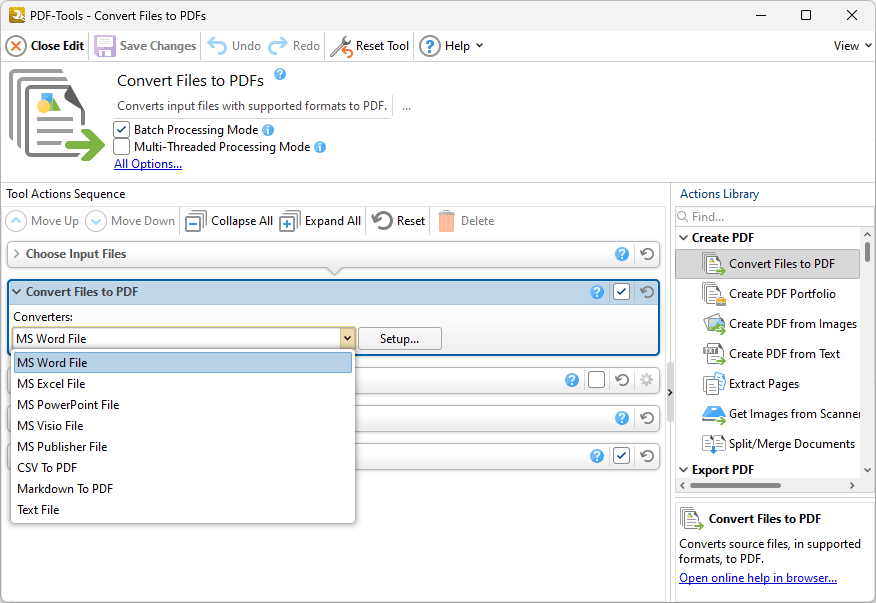
Figure 1. Convert Files to PDF Action Parameters
•The Converters dropdown menu details input formats that have adjustable parameters that can be customized. Select a format and click Setup to determine adjustable parameters when files of the specified format are converted to PDF.
•The MS Word File option contains three parameters:
•Select the Allow for the conversion of RTF files with Microsoft Word box to allow MS Word to convert (*.rtf) files to MS Word format.
•Select the Enable macros in macro-enabled documents box to enable macros in converted MS Word files.
•Select the Include markups in conversion box to include markups made to MS Word files in the conversion to PDF.
•The MS Excel, MS Powerpoint and MS Visio File options contain one parameter:
•Select the Enable macros in macro-enabled documents box to enable macros in converted MS Excel/Powerpoint/Visio files.
•The Text File options are detailed below:
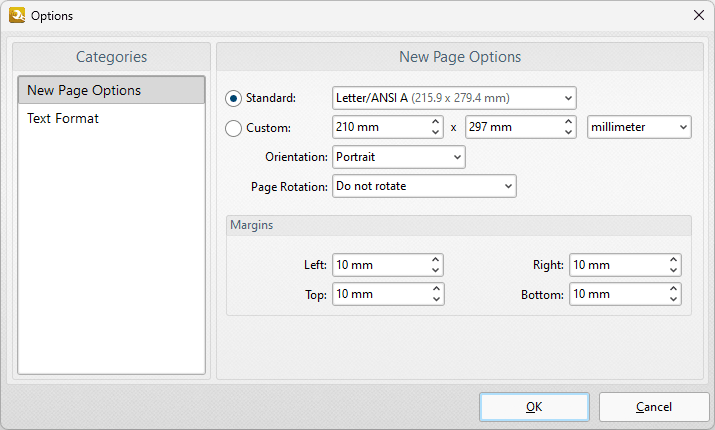
Figure 2. Text File Options Dialog Box, New Page Options
These options are used to determine the size and layout parameters for converted text files:
•Select Standard to convert text files into a PDF of standard dimensions, then select a standard size in the dropdown menu.
•Select Custom to convert text files into a PDF of custom dimensions, then enter the desired dimensions in the number boxes and select the desired units of measurement, orientation and page rotation.
•Use the Margins number boxes to determine the page margins.
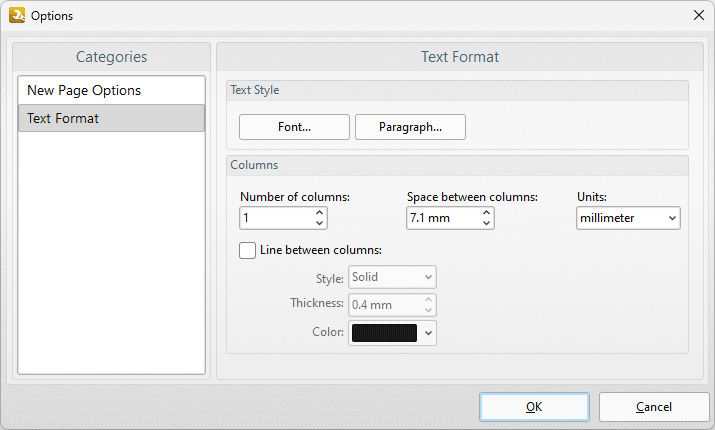
Figure 3. Text File Options Dialog Box, Text Format Options
•Click Font/Paragraph to determine font/paragraph options, as detailed here.
•Use the Number of columns dropdown menu to determine the number of columns of text.
•Use the Space between columns dropdown menu to determine the distance between columns and the Units dropdown menu to determine the units of measurement.
•Select the Line between columns box to insert a line between columns of text, then use the dropdown menus to determine the Style, Thickness and Color of columns as desired.
The CSV to PDF options are detailed below:
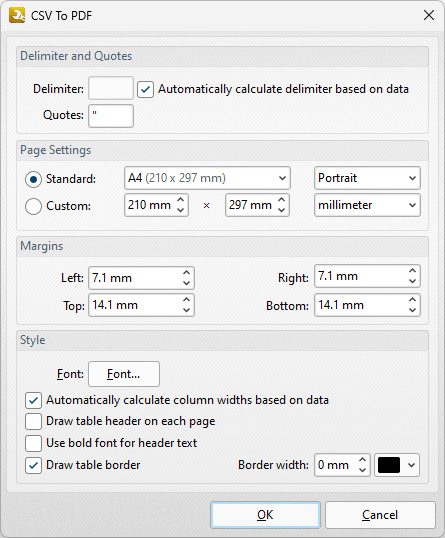
Figure 4. CSV to PDF Dialog Box
•Use the Delimiter text box to specify the delimiter used to delimit values in input CSV documents. Alternatively, select the Automatically calculate delimiter based on data box to detect delimiters automatically.
•Use the Quotes text box to specify the quotes used in input CSV documents.
•Use the Page Settings to determine the size and orientation of converted files:
•Use the Standard dropdown menu to specify standard page dimensions such as those used by the ISO and ANSI, then use the adjacent dropdown menu to specify either Portrait or Landscape as the orientation of output documents.
•Click the Custom button to use custom dimensions, then enter the desired dimensions in the adjacent number boxes. Use the adjacent dropdown menu to specify the units of measurement used.
•Use the Style options to specify the style of output documents:
•Use the Margins boxes to specify the margins of output documents.
•Click the Font button to specify the font of output documents. The Select Font dialog box will open. Select the font, style and size of the desired font and then click OK to save changes.
•Use the Border Width number box to specify the border width on the pages of output documents, and use the adjacent dropdown menu to specify the border color.
•Use the check boxes to enable/disable additional options as desired.
Click OK to save changes.
The Markdown to PDF options are detailed below:
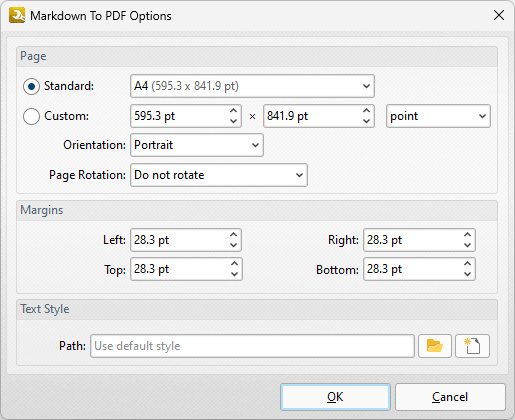
Figure 5. Markdown to PDF Options Dialog Box
•Use the Standard dropdown menu to specify standard page dimensions such as those used by the ISO and ANSI.
•Click the Custom button to use custom dimensions, then enter the desired dimensions in the adjacent number boxes. Use the adjacent dropdown menu to specify the units of measurement used.
•Use the Orientation dropdown menu to specify the orientation of output documents.
•Use the Page Rotation dropdown menu to specify the page rotation of output documents.
•Use the Margins number boxes to specify the margins of output documents.
•Use the Path text box to specify the path to a CSS file in order to specify text style options in output documents.
Click OK to save changes.