 Other Toolbars
The other toolbars in the PDF-XChange Editor user interface are detailed below:
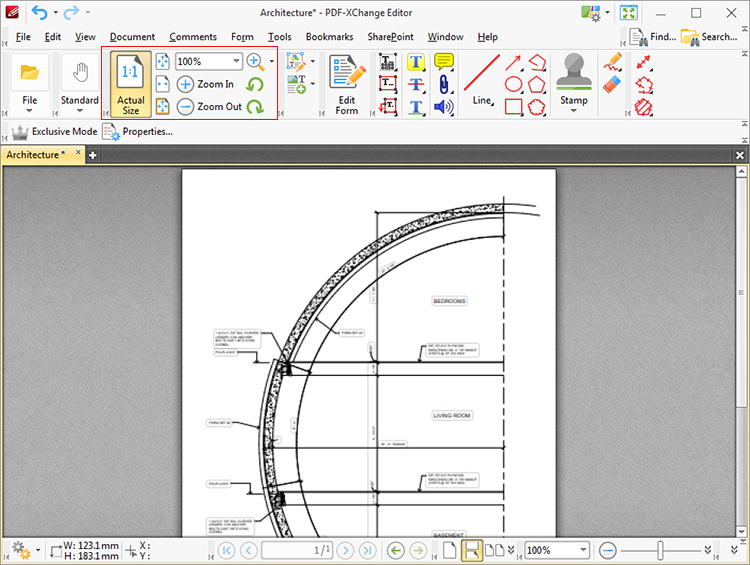
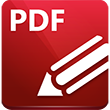
The Document Options Toolbar is located in the lower left corner of the main window:
Figure 1. Document Options Toolbar
•Click the dropdown arrow to access the options detailed in (figure 2) below. •There are two sets of dimensions displayed on the right of the toolbar. This is the Page Measurement information. The document dimensions are shown on the left. The coordinates of the pointer are shown on the right.
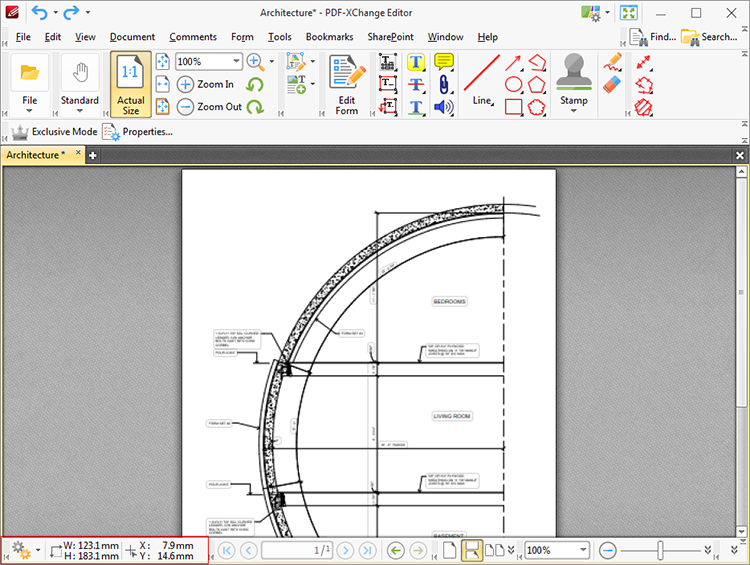
Figure 2. Document Options Menu
•Click Bookmarks to open the Bookmarks pane. See here for further information. •Click Thumbnails to open the Tumbnails pane. See here for further information. •Click Comments to open the Comments pane. See here for further information. •Click Attachments to open the Attachments pane. See here for further information. •Click Fields to open the Fields pane. See here for further information. •Click Signatures to open the Signatures pane. See here for further information. •Click Layers to open the Layers pane. See here for further information. •Click Content to open the Content pane. See here for further information. •Click Destinations to open the Destinations pane. See here for further information. •Click Spell Check to check the spelling of the active document. See here for further information. •Click Properties Pane to open the Properties pane. See here for further information. •Click Show Rulers to view/hide the document rulers. See here for further information. •Click Show Grid to insert a grid behind the active document to assist in the accurate placement of document content. See here for further information. •Click Show Page Size/Position to view/hide the Page Measurement information, which is detailed beneath (figure 1). •Hover over Snap to view options for snapping: •Click Enable Snapping to enable/disable snapping. •Click Snap to Grid to enable/disable snapping to grids. •Click Snap to Guides to enable/disable snapping to guides. •Click Snap to Objects to enable/disable snapping to objects. •Further information about snapping is available here. •Click Find to launch the find text function. See here for further information. •Click Document Properties to launch the Document Properties dialog box. See here for further information. |
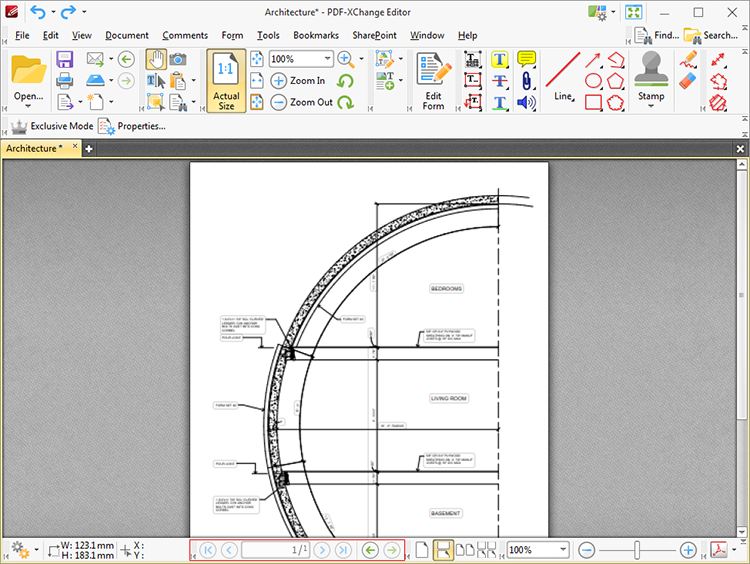
The Edit Content Toolbar contains options for editing document content:
Figure 3. Edit Content Toolbar
•Click Edit Content to activate the Edit Content Tool and edit page content. When this tool selected, the active document is divided into editable sections based on the images and text it contains. These sections can then be resized, repositioned and edited as desired. Click the dropdown arrow next to this icon for further options: •Select Text to edit only textual page content. The Edit Content Tool will then select only document text. •Select Images to edit only document images. The Edit Content Tool will then select only images. •Select Shapes to edit only document shapes. The Edit Content Tool will then select only paths and shadings. •Click Add to add content to documents. The following options are available: •Click Add Text to add text to documents, as detailed here. •Click Add Image to add images to documents, as detailed here. •Click Add Barcode to add barcodes to documents, as detailed here.
Further information about editing pages is available here. |
The File Toolbar contains file-level options for documents:
Figure 4. File Toolbar
•Click Open to open documents. Click the dropdown arrow to view recent documents. •Click Save to save documents. •Click Print to print documents. See here for further information. •Click Scan to scan documents. See here for further information. •Click Email to email documents from PDF-XChange Editor. See here for further information. •Click Back (or Ctrl+left arrow key) to move to the previous document location. •Click Forward (or Ctrl+right arrow key) to move to the next document location. This action becomes available when the Back action has been used. |

The Launch Application Toolbar is located on the lower-right corner of the main window:
Figure 5. Launch Application Toolbar
This toolbar provides a convenient way to open active documents using third party applications. See here for instructions on how to add applications to this toolbar. |
The Measure Toolbar contains options for measuring specific elements of documents:
Figure 6. Measure Toolbar
The following options are available:
|
The Page Layout Toolbar is located on the lower right side of the main window:
Figure 7. Page Layout Toolbar
•The page layout options determine how pages of active documents are displayed in the main window. The layouts correspond to those displayed in the icons of the toolbar: •Single Page displays documents a single whole page at a time. •Continuous displays documents as single pages continuously, which means consecutive pages can be viewed at the same time when scrolling. •Two Pages displays documents two whole pages at a time. Pages are placed adjacently in the main window. •Two Pages Continuous displays documents as two pages continuously, which means consecutive pairs of pages can be viewed at the same time when scrolling.
Further options relating to the page display are available here. |
The Page Navigation Toolbar is located at the bottom of the main window:
Figure 8. Page Navigation Toolbar
•Click the blue arrow icons to move to the first page, previous page, next page or last page of documents. •Click the green arrow icons to move between the most recent document views. •The number box at the center of the Page Navigation toolbar shows the current page and the total number of pages in the active document. Enter a page number and press Enter to move to it. |
The Page Zoom Toolbar is located in the lower-right section of the main window:
Figure 9. Page Zoom Toolbar
The Page Zoom Toolbar is used to zoom in on/out from the active document:
•Use the options in the dropdown menu to select a predefined zoom level. •Clear the number box, then enter a custom zoom level and press Enter to zoom to a custom level. •Click the plus and minus icons on either side of the zoom slider to move between predefined zoom levels. •Click and drag the slider to move to a custom zoom level. |
The Properties Toolbar is located in the upper section of the main window:
Figure 10. Properties Toolbar
The Properties Toolbar becomes active when an object or tool that features customizable options is selected. The options in the Properties Toolbar depend on the content selected:
•The properties available when tools are in use are detailed on the tool pages, which are available here. •Text editing options are detailed in the Properties Toolbar when tools that feature text options are in use. See here for further information. •Press Ctrl+E to show/hide the Properties Toolbar. |
These toolbars are located in the upper section of the user interface:
Figure 11. Quick Access, Quick Launch and Quick Find Toolbars
•Click •Click •Click •Click •Click •Click
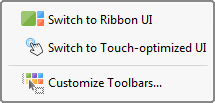
Figure 12. UI Options
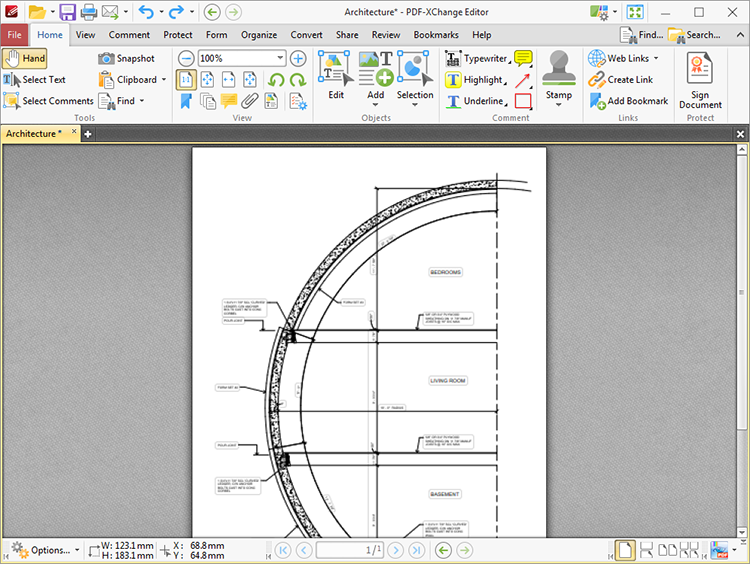
•Click Switch to Ribbon UI to switch to the ribbon layout:
Figure 13. Ribbon UI Layout
The ribbon layout utilizes contextual tabs instead of menus and submenu items. This means that the submenu items displayed in the classic UI layout are displayed instead as icons in the user interface, which eliminates the need for several parallel toolbars and streamlines the use of PDF-XChange Editor. The layout of the features and functionality in the ribbon UI varies from the classic UI. The manual will be updated to include the ribbon UI in the near future.
•Click Switch to Touch-optimized UI to switch from Mouse-optimized UI to Touch-Optimized UI and vice versa. The Touch-optimized UI features larger icons and is intended for use in conjunction with tablets, smartphones and similar devices. •Click Customize Toolbars to customize the layout of toolbars, the commands that they contain and their display/locking options. See here for further information. |
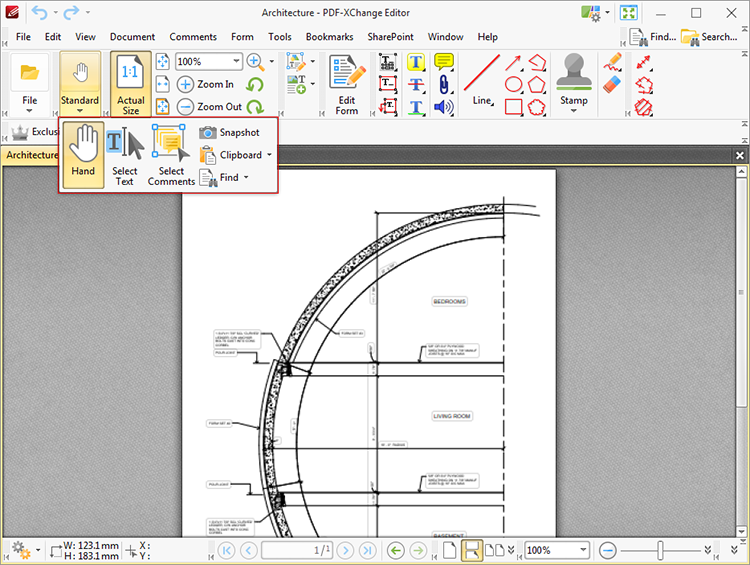
The Standard Toolbar contains options for viewing/editing documents:
Figure 14. Standard Toolbar
•Click Hand to activate the Hand Tool and scroll through documents. •Click Select Text to activate the Select Text Tool and select text for editing purposes. •Click Select Comments to activate the Select Comments Tool and select comments for editing purposes. •Click Snapshot to activate the Snapshot Tool to take snapshots of pages areas/images. •Click Clipboard to cut/copy/paste from the clipboard. •Click Find to activate the Find, Search or Internet Search features. These features are used to locate specified text in documents or on the internet. |
The View Toolbar contains options to manipulate the page view and enable the Zoom Tools:
Figure 15. View Toolbar
•Click Actual Size to set the zoom level to 100% and view pages at their actual size. •Click Fit Page •Click Fit Width •Click Fit Visible •Click Zoom In/Zoom Out to zoom in on/out from the active document. •Click Zoom Tools •The Zoom In/Out Tool is used to zoom in on/out from the active document. The pointer becomes a magnifying glass icon when this tool is enabled. Move it to the desired location and then click to zoom. Hold down Ctrl and click to zoom out. •The Loupe Tool utilizes a zoom pane that magnifies page portions to assist in document editing. See here for further information. •The Pan and Zoom Tool utilizes a zoom pane that enables dynamic page navigation. See here for further information. •Click Rotate CCW •Click Rotate CW |