 Number Pages
Click Number Pages to number document pages and create page ranges:
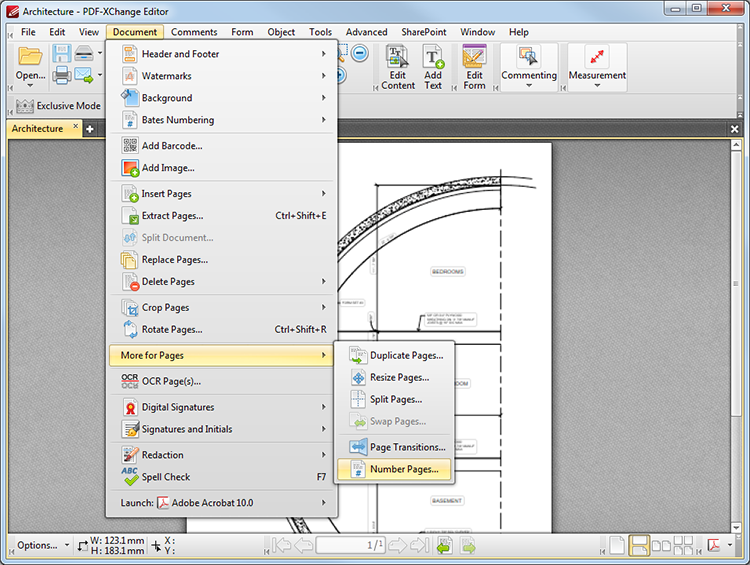
Figure 1. Document Tab Submenu. Number Pages
The following dialog box will open:
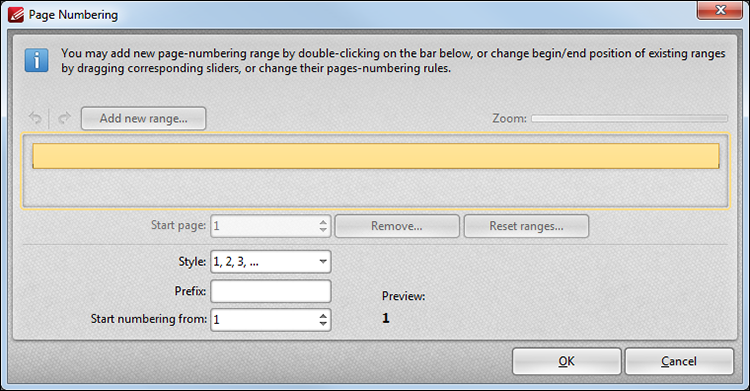
Figure 2. Page Numbering Dialog Box
Please note that this feature relates to page ranges/numbers as they appear in the Thumbnails Pane. (The Header and Footer feature can be used to create/edit document page numbers). Additionally, it is necessary to select the Use logical page numbers box in the Page Display preferences tab in order for changes made with this feature to be visible.
•Click the Add new range button to add a new page range to the active document. The Add new range dialog box will open. Enter the number of the page at which the range is to begin into the number box. (Please note that the default range of all documents starts at 1. Therefore subsequent page ranges must feature a different starting value). Click OK to continue the process. Then use the white arrow icon beneath the yellow range bar to determine the page range.
•Click Remove to remove the selected page range.
•Click Reset ranges to reset all page ranges.
•Use the Style menu to determine the numbering style.
•Use the Prefix box to add a prefix to page numbers.
•Use the Start numbering from box to determine the number from which the numbering begins.
•Use the arrow icons on the left of the Add New Range button to redo/undo operations.
•Click OK to apply changes.
Number Pages Example
The example below details the page numbering process when numbering the pages of an academic document. The image in (figure 3) displays the Thumbnails pane before page numbers have been edited:
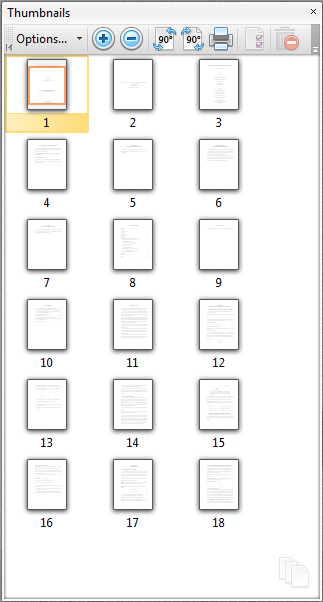
Figure 3. Initial Thumbnails pane
The process detailed above can be used to break the document down into an introduction, opening pages that feature roman numeral numbering, main document, conclusion and references. The Page Numbering dialog box would appear as below:
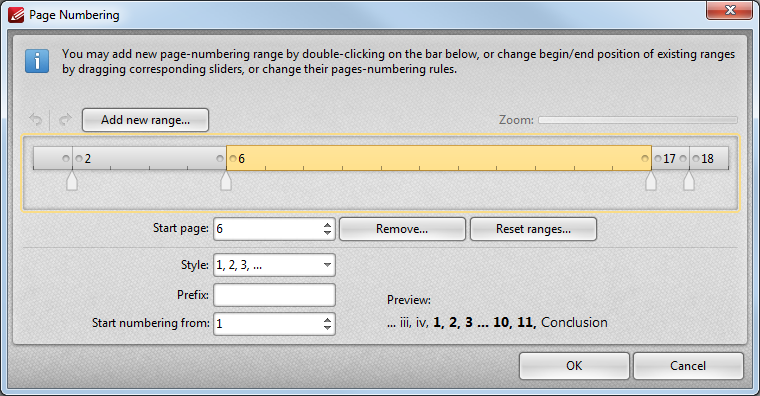
Figure 4. Page Numbering Dialog Box Example
The resultant Thumbnails pane appears as below:
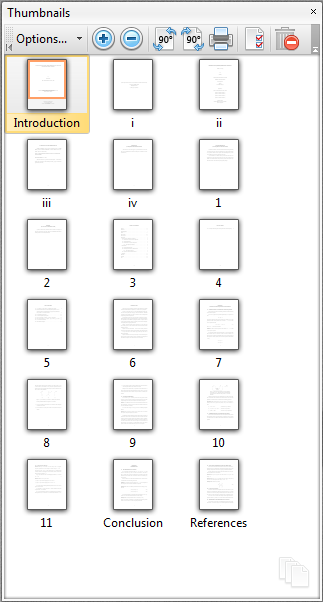
Figure 5. Final Thumbnails Pane
Please note that to use text as the name of a number range it is necessary to select None in the Style menu and then enter the desried name in the Prefix text box. When page ranges have been determined they will be displayed in the Page Navigation Toolbar at the bottom of the main window:
![]()
Figure 6. Updated Page Navigation Toolbar
Additionally, it is then possible to use this toolbar to browse to customized page ranges. Enter the name of the page range and press Enter. PDF-XChange Editor will move to the first page of the desired range.