 Restricting Available Places When Using "Add a Place"
'Places' in PDF-XChange Editor refer to user-defined locations in the Open and Save dialog boxes. Places are frequently used locations that are used to open and save documents, such as a folder on the local computer or a cloud service such as Dropbox or Google Drive. The supported cloud services in PDF-XChange Editor each have an associated plugin, and only places with active plugins are available when adding a new place.
When users want to add a new place to PDF-XChange Editor, they click the File tab, then click Add a Place:
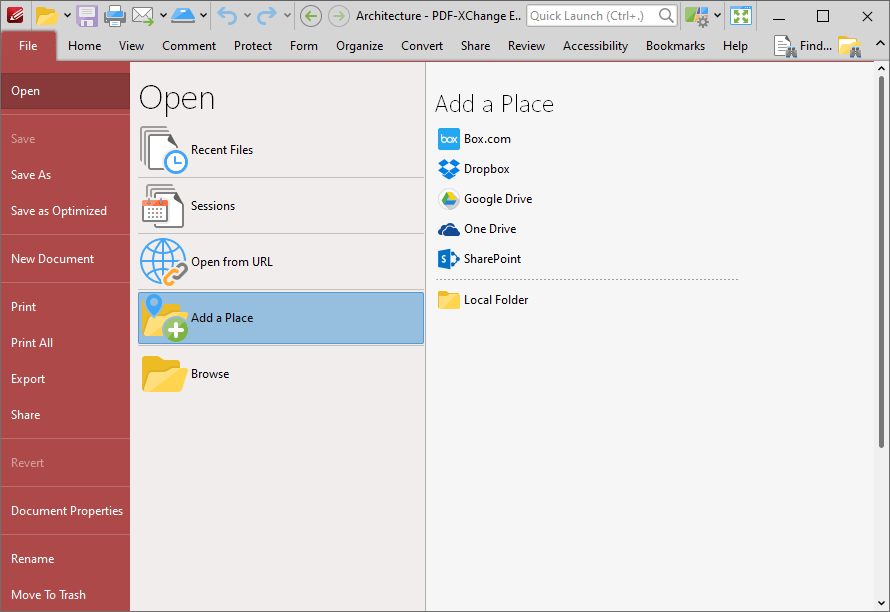
Figure 1. File Tab, Add a Place, Default Cloud Services Displayed
Plugins for places can be disabled via the preferences in the GUI of PDF-XChange Editor. Click Preferences in the File tab to open the preferences, then click the Plugins category in the list on the left:
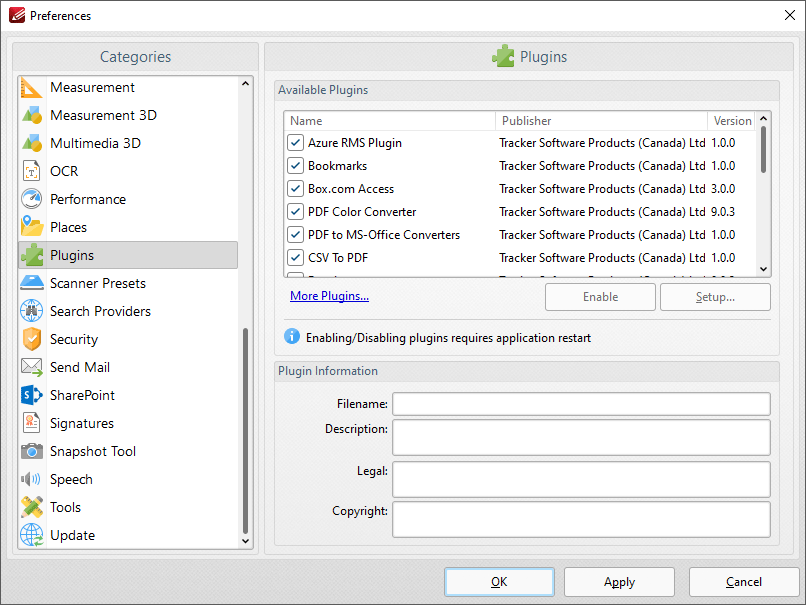
Figure 2. Preferences Dialog Box, Plugins Category Selected
Plugins for places are listed in the Available Plugins pane. Clear boxes to disable the associated plugin. Disabling the plugin of a cloud service completely removes the service from PDF-XChange Editor and it will no longer be listed in the list of available places:

Figure 3. File Tab, Add a Place Options, All Places except SharePoint Disabled
Administrators can use the PDF-XChange Editor administrative template to enforce their choice of available plugins. The policy takes a list of plugins and a value for their state, with '0' meaning disabled and '1' meaning enabled. The format of the list is:
[plugin name]:[value]
and items are separated with a | (pipe) character. The default setting is to allow all plugins, which means the options for customization are either to specify a list of only the plugins you wish to disable, or to name each plugin and their desired state explicitly. Wild cards can be used with the * character.
Example
The following policy will disable the Box.com, Dropbox, Google Drive and One Drive plugins, and leave the SharePoint plugin enabled:
BoxFileSys:0|DropBox:0|GoogleDrive:0|OneDrive:0
This policy can be applied as follows:
1. Open the domain controller, then select the Plugins folder in the PDF-XChange Editor template.
2. Select the "Plugins Access" policy:
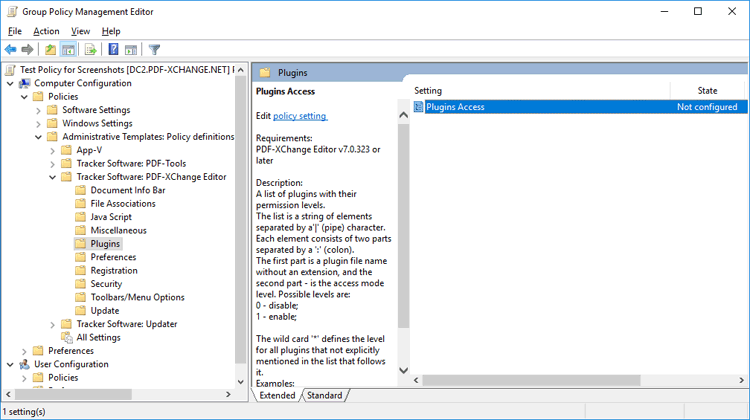
Figure 4. Group Policy Management Editor, PDF-XChange Editor Plugins
3. Enable the policy and apply the desired setup:
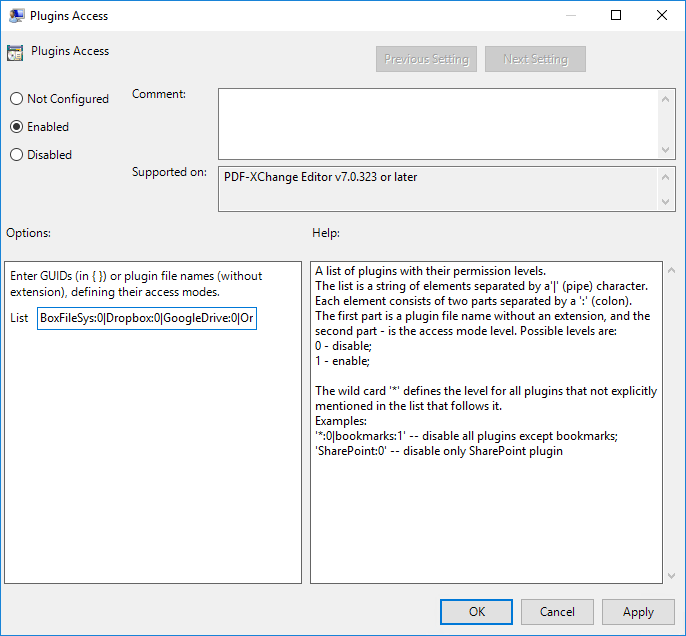
Figure 5. Plugin Access Dialog Box, Plugins Access Policy Enabled
The names of the plugins files are available in the GUI of PDF-XChange Editor, and can be viewed in the Preferences dialog box. Click Preferences in the File tab to open the preferences, then click the Plugins category in the list on the left. Select a plugin in the Available Plugins pane to view the plugin information. The plugin filename is displayed at the top:

Figure 6. Preferences Dialog Box, Plugins Category Selected, Box.com SharePoint Plugin Selected
Note that the file extension should not be used in the policy, so for example the SharePoint plugin uses SharePoint, as opposed to SharePoint.pvp