 Split Options
Click Split to view splitting options:
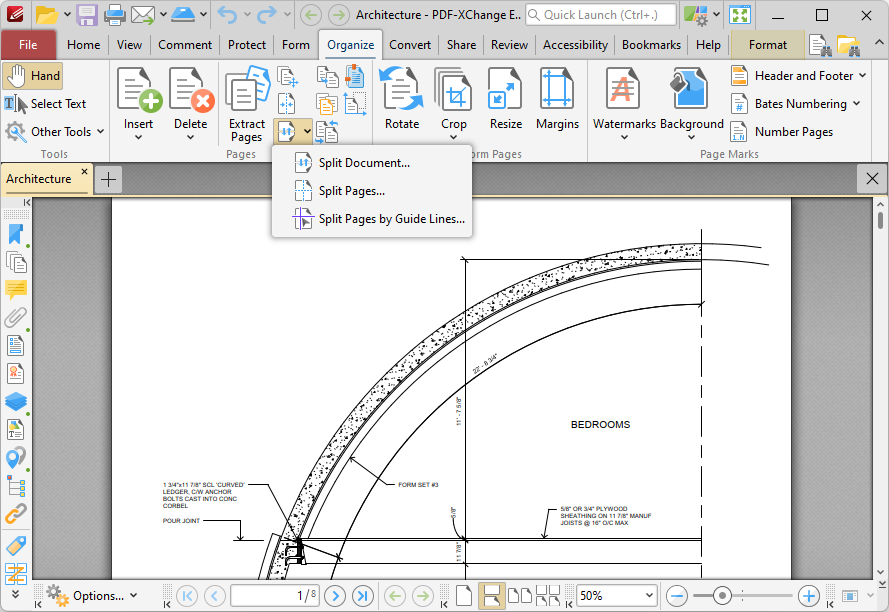
Figure 1. Organize Tab, Split Options
Split Document
The Split Document feature is useful for the breaking down of one document into several smaller documents, such as books into chapters. Click Split Document to split the current document. The Split Document dialog box will open:
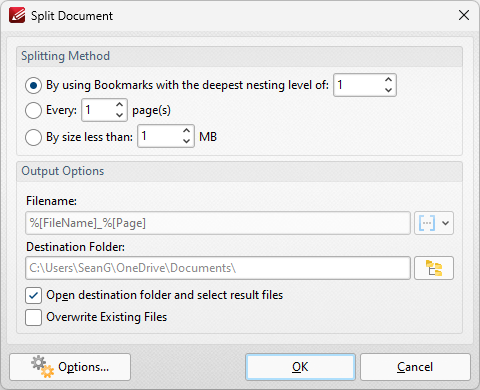
Figure 2. Split Document Dialog Box
•Select a Splitting Method to determine how the document is split:
•Select By using Bookmarks with the deepest nesting level of to split documents according to its deepest nesting-level of bookmarks.
•Select Every 'n' pages to split the document every n pages. For example, enter the value '3' to place a split after every third page.
•Select By Size less then to split documents into smaller documents that have a maximum size of that specified in the number box.
•Use the Output Options to determine how split documents are saved:
•Enter the filename in the Filename text box. Click the blue icon to use macros.
•Enter the name of the desired folder in the Destination Folder text box, or click the icon to select a folder.
•Select the Open the Destination Folder box to open the destination folder when the process is complete.
•Select the Overwrite Existing Files box to overwrite existing files that have the same name as those being saved. This is a useful feature when documents need to be split multiple times.
•Click Options to determine the action taken for Comments, Form Fields, Bookmarks and Layers in split documents:
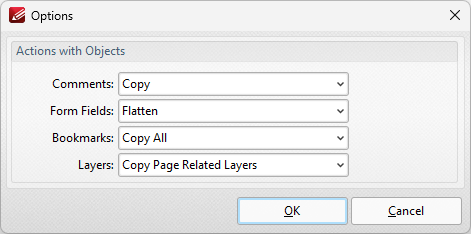
Figure 3. Options Dialog Box
•Use the Comments dropdown menu to determine the action taken from comments:
•Select Copy to copy comments.
•Select Flatten to flatten comments.
•Select Do Not Copy to not copy comments.
•Use the Form Fields dropdown menu to determine the action taken for form fields:
•Select Copy to copy form fields.
•Select Flatten to flatten form fields.
•Select Do Not Copy to not copy form fields.
•Use the Bookmarks dropdown menu to determine the action taken for bookmarks:
•Select Do Not Copy to not copy bookmarks.
•Select Copy All to copy all bookmarks.
•Select Copy Related to copy only bookmarks that are contained in the pages that are being split.
•Use the Layers dropdown menu to determine actions taken for layers in split documents:
•Select Do Not Copy to not copy layers when documents are split.
•Select Copy All to copy all layers when documents are split.
•Select Copy Page Related Layers to copy only layers that are contained in the pages that are being split.
Click OK to split documents.
Split Pages
The Split Pages feature is a convenient feature for splitting document pages into smaller sections. Click Split Pages to split the pages of the current document. The Split Pages dialog box will open:
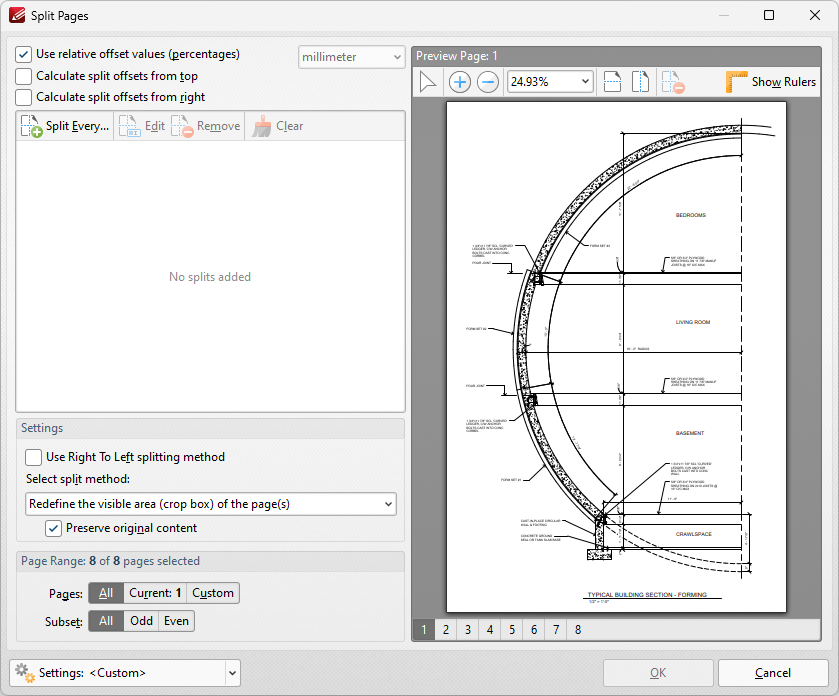
Figure 2. Split Pages Dialog Box
•Percentage is the default method used to split pages. Clear the Use relative offset values box to use metric measurements instead.
•Select the Calculate split offsets from top/right boxes to calculate split offsets from these locations. If neither of these boxes are selected then split offsets will be calculated from the bottom-left of the document.
•Click Split Every to split at even intervals throughout the document. The Split Every dialog box will open, as detailed below.
•Click Add Horizontal Split and/or Add Vertical Split at the top of the preview pane to add splits to documents. Splits are inserted at 50% by default and will appear in the preview pane and the list of splits when these options are used, as detailed above. Click and drag to reposition splits as desired.
•Use the plus and minus zoom icons to edit the view of the preview pane.
•Click Edit Split/Remove Split to edit/remove selected splits in the list of splits.
•Select the Use Right To Left splitting method box to split documents from right to left. Note that the order in which documents are split determines the order of sections in the split document.
•Select the Remove source pages after splitting them to remove the original document from the active pane when pages are split. If this box is cleared then both the original document and the split pages will be present after pages are split.
•Select an option from the Select split method dropdown menu to determine the method used to split documents:
•Change the physical size of the pages adjusts the size of pages in order to split them.
•Redefine the visible area (crop box) of the pages adjusts the crop box of pages. Further information about the crop box and other page boxes is available here. When this option is used the Preserve original content box is available. If this option is enabled then the visible page area will be reduced, but the cropped content will remain available and be present if, for example, pages are resized subsequently.
•Use the Page Range settings to determine the page range of split pages:
•Select All to specify all pages.
•Select Current to specify only the current page.
•Select Custom to specify a custom page range, then enter the desired page range in the adjacent number box. Further information about how to specify custom page ranges is available here.
•Use the Subset options to specify a subset of selected pages. Select All, Odd or Even as desired.
•Note that you can also press the 'H' or 'V' keys on your keyboard to create horizontal/vertical splits, and press the 'M' key to remove the most recent split.
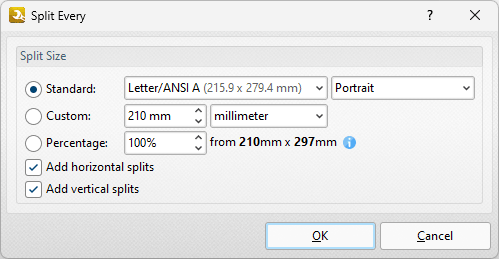
Figure 3. Split Every Dialog Box
•Select Standard to split documents at intervals of standard dimensions, then select the desired dimension in the dropdown menu, and specify the desired orientation in the second dropdown menu.
•Select Custom to split documents at intervals of custom dimensions, then enter the desired dimensions and units of measurement in the adjacent number box and dropdown menu.
•Select Percentage to split documents according to a percentage of the document page size.
•Select the Add horizontal/vertical splits boxes as desired.
Click OK to split documents.
The Split Pages by Guide Lines feature is used to split documents according to guide lines, which you can create and edit as detailed here. When this option is selected the Split Pages dialog box will open:
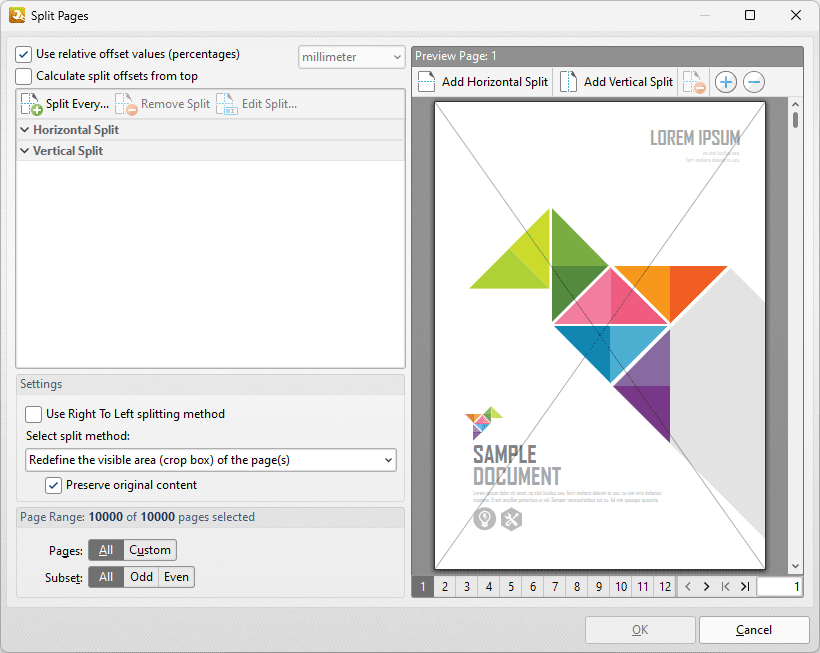
Figure 4. Split Pages Dialog Box
•Select the Use Right to Left splitting method box to split documents from the top-right corner, or clear this box to split documents from the top-left corner.
•Select the Remove source pages after splitting them box to remove split pages from the document when the split is performed.
•Use the Select split method dropdown menu to determine the type of split that is performed:
•Select Redefine the visible area (crop box) of the page(s) to redefine the crop box in order to crop pages.
•Select Change the physical size of the pages to change the size of pages in order to crop pages.
•Select the Preserve original content to preserve the original document content when pages are split.
•Use the Page Range settings to determine the pages to which the split applies:
•Select All to specify all pages.
•Select Current to specify only the current page.
•Select Custom to specify a custom page range, then enter the desired page range in the adjacent number box. Further information about how to specify custom page ranges is available here.
•Use the Subset options to specify a subset of selected pages. Select All, Odd or Even as desired.
Click OK to split pages.