 Build Table of Contents
The Build Table of Contents action uses bookmarks to create a table of contents for documents. It contains the following customizable parameters:
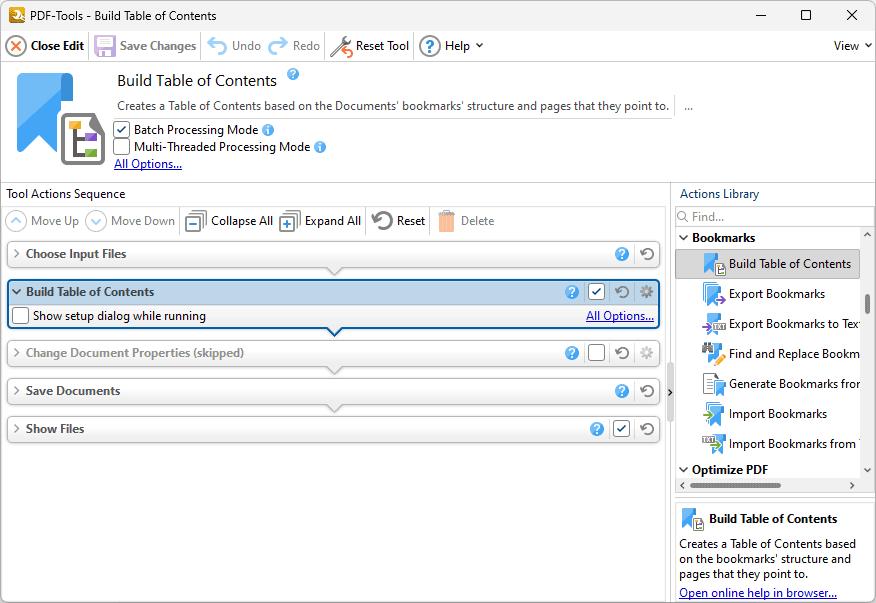
Figure 1. Build Table of Contents Action Options
•Click All Options to determine conversion options for the table of contents. The Build Table of Contents dialog box will open, as detailed below.
•Select the Show setup dialog while running box to launch the Build Table of Contents dialog box and customize settings each time this action is used. Clear this box to disable the Build Table of Contents dialog box from opening each time the action is used, which is useful when the same settings are used consistently.
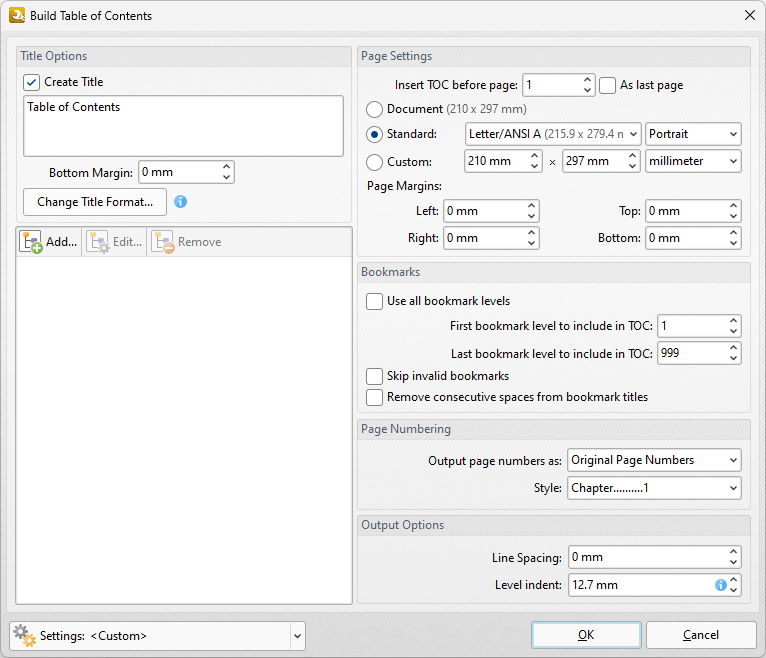
Figure 2. Build Table of Contents Dialog Box
•Use the Title text box to enter a title for the table of contents. Click Change Title Format to change the font style of the title, as detailed here.
•Click Add to add font styles to bookmark levels. Font styles are detailed here.
•Use the Page Settings to determine settings for the table of contents:
•Use the Insert TOC before page number box to determine where the table of contents is inserted, or selected the As last page box to append it to the document.
•Select Document to set the page size of the table of contents as the same size of the input document pages.
•Select Standard to set the page size of the table of contents to a standard size, then select a size in the dropdown menu and either Portrait or Landscape as the orientation.
•Select Custom to set a custom page size, then use the number boxes and the units of measurement dropdown menu to determine the size.
•Use the Page Margins number boxes to determine the margins in the table of contents.
•Use the Bookmarks settings to determine the bookmarks used in the creation of the table of contents:
•Select the Use all bookmark levels box to use all bookmark levels. Alternatively, use the number boxes to determine the first and last bookmark level used.
•Select the Skip invalid bookmarks box to exclude invalid bookmarks, such as those that do not have a destination, from the table of contents.
•Select the Remove consecutive spaces from bookmark titles box as desired.
•Use the Page Numbering options to determine how page numbers are displayed in the table of contents:
•Select an option in the Output Page Numbers as dropdown menu to determine the reference used for entries in the table of contents.
•Select an option in the Style dropdown menu to determine the style of entries in the table of contents.
•Use the Output Options to determine additional output options:\
•Use the Line Spacing dropdown menu to determine the line spacing for the table of contents.
•Use the Level Indent dropdown menu to determine the level indent used for the table of contents.
Click OK to save changes.
Table of Contents Settings
Use the Settings dropdown menu to save/manage/delete custom settings:
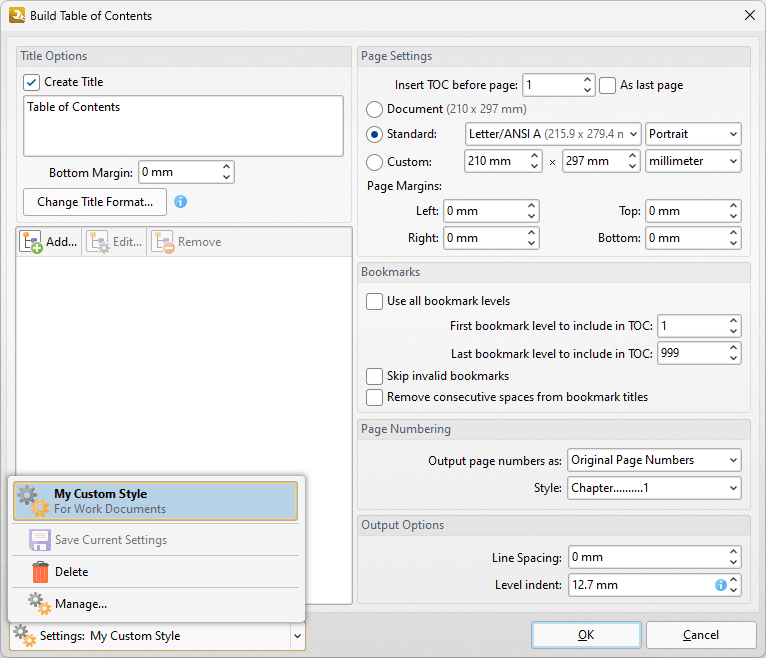
Figure 3. Scanner Settings Dropdown Menu Options
•Select predefined modes as desired.
•Click Save Current Settings to save the current settings as a profile for subsequent use.
•Click Delete to delete selected profiles. Note that this option is only available for customized profiles.
•Click Manage to manage preset/customized profiles. The Manage Presets dialog box will open:
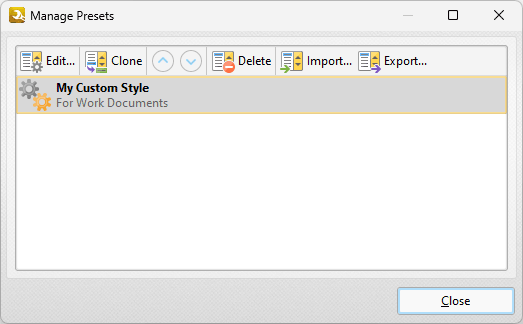
Figure 4. Manage Presets Dialog Box
•Click Edit to edit selected profiles. Note that this option is only available for customized profiles.
•Click Clone to clone selected profiles. This option can be used to customize the settings of preset profiles, which cannot be customized in their default state.
•Use the up and down arrows to move selected profiles up or down in the list.
•Click Delete to delete selected profiles. Note that this option is only available for customized profiles.
•Click Import to import profiles from a saved file.
•Click Export to export profiles to file.