 Perimeter Tool
Click Perimeter Tool to measure the distance between multiple points:
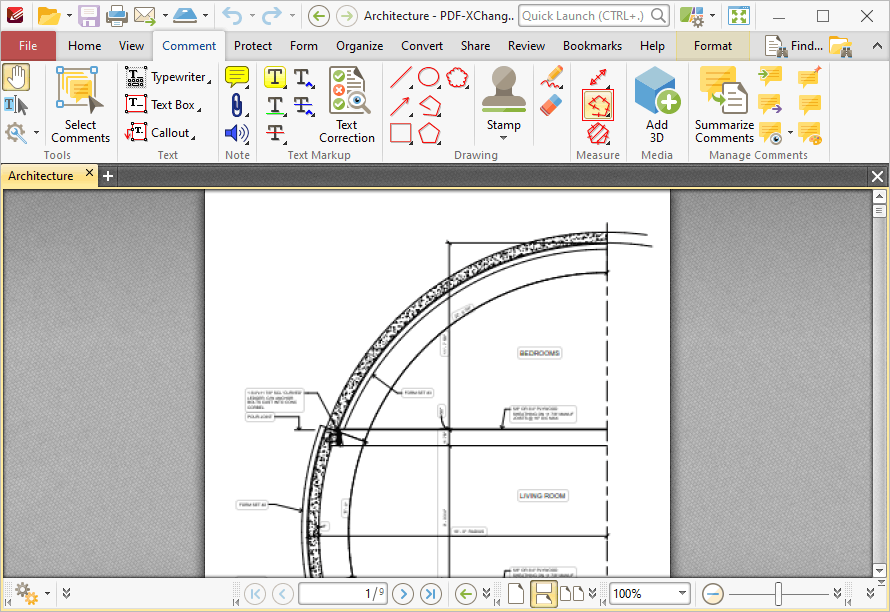
Figure 1. Comment Tab, Perimeter Tool
When the Perimeter Tool is selected the pointer becomes a crosshairs icon. Click to start a perimeter line. A red line will appear and the Perimeter Tool information box will be displayed in the lower right corner of the active window. This box will update as the tool is used. Drag the crosshairs to the desired location and click again to define the first line of the perimeter. Repeat the process until the perimeter is complete and then double-click to set the final point:
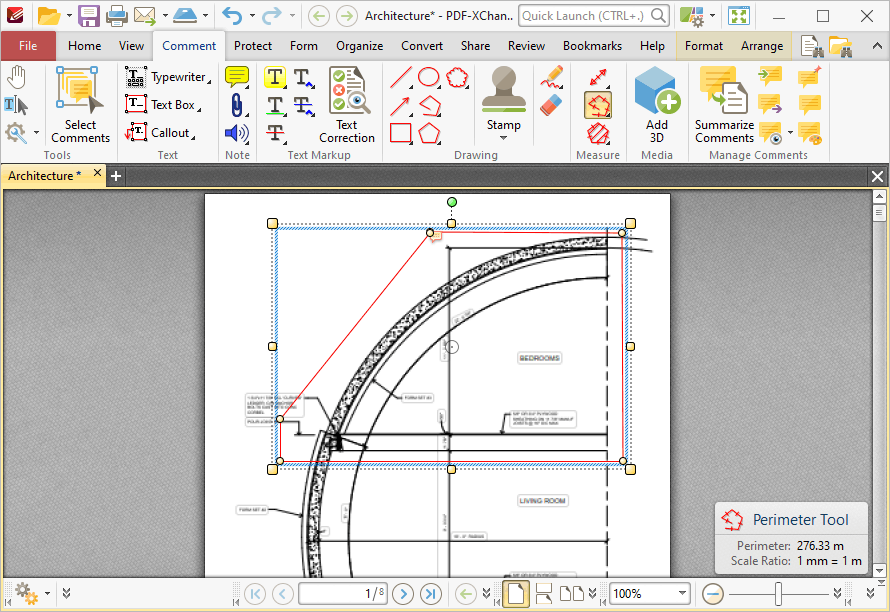
Figure 2. Perimeter Tool Example
•The Perimeter Tool calculates and displays distances measured according to the active scale, which can be determined in the Format tab, as detailed below.
•Click and drag the perimeter line to reposition it. The circle at the center can also be used for this purpose.
•Click and drag the outer control points to resize the perimeter line.
•Click and drag the inner control points to reshape the perimeter line.
•Click and drag the green control point at the top to rotate the perimeter line. Hold down Shift to rotate at increments of fifteen degrees.
•Use the arrow keys to reposition perimeter lines. Hold down Shift to move at an increased increment.
•Use the editing aids detailed here to assist in the precise placement of perimeter lines.
•Hold down Shift to create perimeter lines at increments of fifteen degrees.
•Right-click perimeter lines for further options. See here for an explanation of these options.
•Press Ctrl+' to open the Properties pane for selected perimeter lines and view/edit properties:
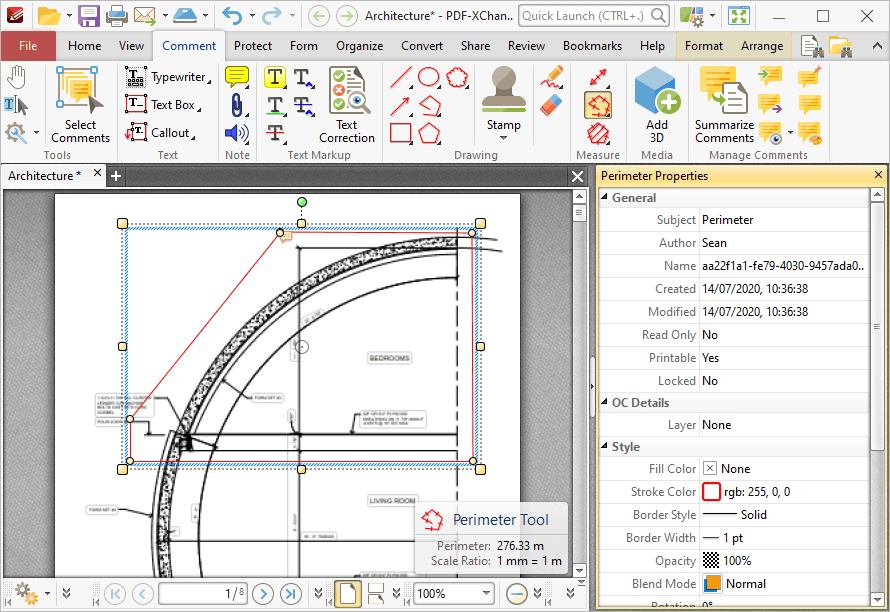
Figure 3. Perimeter Tool, Perimeter Properties Pane
•Subject is the name of the perimeter annotation, as referenced in the Comments pane.
•Author is the name of the user that created the perimeter annotation.
•Name is the unique name of the perimeter annotation, as referenced within the application.
•Created is the date and time at which the perimeter annotation was created.
•Modified is the date and time at which the perimeter annotation was last modified.
•Read Only is the read only status of the perimeter annotation. If this property is enabled then users cannot interact with the annotation. Please note that it is necessary to use JavaScript to change the value of this property.
•Printable is the print status of the perimeter annotation. If this property is enabled then the annotation is printed with the document. If this property is not enabled then the annotation is not printed.
•Locked is the locked status of the perimeter annotation. If this property is enabled then the annotation cannot be deleted and its properties (including its position and size) cannot be modified by users.
•Layer specifies the optional content layer to which the perimeter annotation belongs. Further information about layers is available here.
•Fill Color determines the color of the line ending style used at the start of the perimeter annotation. The line ending property is detailed below.
•Stroke Color determines the color of the perimeter annotation.
•Border Style determines the style of the annotation.
•Border Width determines the width of the annotation.
•Opacity determines the level of transparency in the perimeter annotation.
•Blend Mode determines how perimeter annotations blend with overlapping content. These options are explained here.
•Rotation determines the degrees of rotation of the perimeter annotation.
•Start determines the line ending style used at the start of the perimeter annotation.
•End determines the line ending style used at the end of the perimeter annotation.
•Start Scale determines the size of the line ending used at the start of the perimeter annotation.
•End Scale determines the size of the line ending used at the end of the perimeter annotation.
•Scale determines the scale used for the perimeter annotation. Further information about scales is available here.
•Precision determines the precision with which scale conversions are displayed.
•Decimal determines the symbol used as the decimal separator.
•Group determines the symbol used as the group separator.
Note that when the Perimeter Tool is enabled, the Format tab is available and can be used to customize the default properties of perimeter annotations:
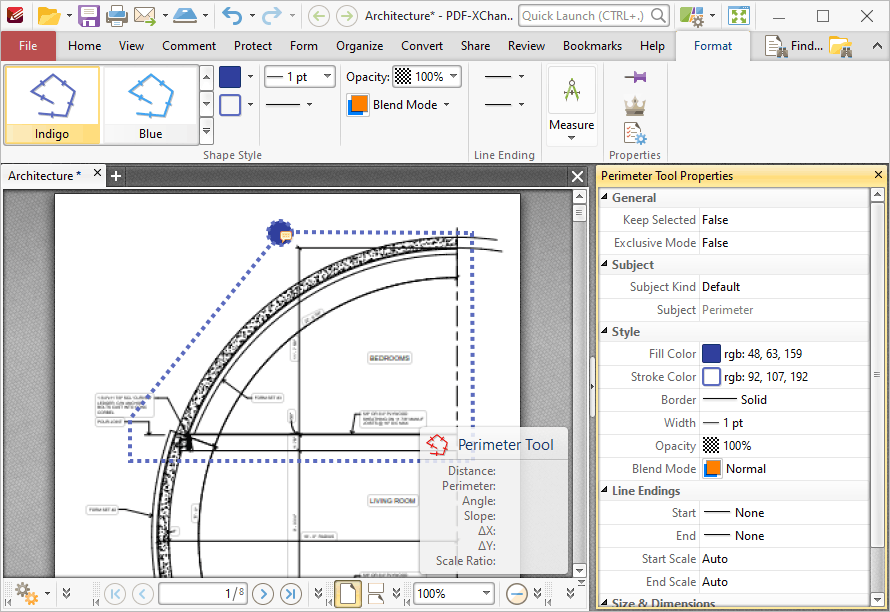
Figure 4. Format Tab, Perimeter Tool
•Click options in the Shape Style group to select alternative default perimeter annotation styles.
•Click Keep Selected to keep the Perimeter Tool selected and create multiple annotations consecutively. If this option is disabled then PDF-XChange Editor will revert to the designated default tool after the creation of one annotation.
•Click Exclusive Mode to give the Perimeter Tool priority over all other document content. When Exclusive Mode is enabled, the pointer ignores all interactive elements of documents other than base content. This makes it possible to create lines on areas that overlap with other content without the risk of accidentally selecting undesired items. When Exclusive Mode is disabled, the pointer recognizes and interacts with all content as normal.
•Click Properties to view/edit the Perimeter Tool properties, as detailed above.
•Click Export to CSV to export a summary of document comments to a comma-separated-values document. Note that when documents that contain perimeter annotations are exported to comma-separated-values, the output document will contain an "Alt. Value" column for perimeter annotations. This value details the area of perimeter annotations.
•Click Edit Label to create/edit the text label of the perimeter annotation, or click Delete Label to delete the label. Note that labels are displayed when the pointer is hovered over the annotation.
•When perimeter annotations are selected, the Style Tools dropdown menu is available in the Format tab. It contains the following options:
•Click Copy Comment Style to copy the style properties of perimeter annotations.
•Click Apply Copied Comment Style to apply a copied perimeter annotation style to selected annotations.
•Click Apply Copied Comment Appearance to apply a copied perimeter annotation style to selected annotations.
•Click Make Current Properties Default to set the properties of the perimeter annotation as the default properties for subsequent annotations.
•Click Apply Default Properties to apply the default perimeter annotation properties to selected perimeter annotations.
•When perimeter annotations are selected, the Pop-up group is available in the Format tab and can be used to interact with the pop-up note of the annotation:
•Click Open to open the pop-up note.
•Click Hide to hide the pop-up note.
•Click Reset Location to reset the location of the pop-up note.
•When perimeter annotations are selected, the Arrange tab is also available and can be used to manipulate comments as detailed here.
Note that the Comment Styles Palette can be used to edit and save customized perimeter annotation styles for subsequent use, and the Commenting preferences can be used to view/edit preferences for all comments.