 Miscellaneous Document Operations
There are multiple further options that relate to document-level operations within PDF-XChange Editor. See below for instructions on how to:
JavaScript is an object-oriented computer programming language that is used to create interactive effects within documents/web browsers. Follow the instructions below to add JavaScript to documents:
1. Click the File tab, then click Document Properties.
2. Click JavaScript in the Categories menu.
3. Click the Add button. The JavaScript Editor dialog box will open.
4. Enter a name for the Javascript, then enter the new JavaScript in the text box.
5. Click OK.
Note that JavaScript preferences can be determined here.
|
1. Click the Help tab.
2. Click Check for Updates.
|
1. Click the File tab.
2. Click Close All.
|
1. Click the File tab.
2. Click Close. Alternatively, click the cross located at the top-right of the document name in the document tab.
|
1. Click the File tab.
2. Click Save As, then click Browse. The Save File As dialog box will open.
3. Select the desired format in the Save as type dropdown menu.
4. Click Save.
|
Named destinations are user-defined locations in documents that operate in a similar manner to bookmarks, with the difference that they remain constant when pages are moved or deleted. They can be used in conjunction with Bookmarks, Go To Page actions and the /Open command line to navigate to specified locations. Follow the instructions below to convert named destinations into regular destinations. Further information on named destinations is available here.
1. Click the Bookmarks tab
2. Click Convert Named Destinations To Regular Destinations.
3. Follow the instructions detailed here.
|
Named destinations are user-defined locations in documents that operate in a similar manner to bookmarks, with the difference that they remain constant when pages are moved or deleted. They can be used in conjunction with Bookmarks, Go To Page actions and the /Open command line to navigate to specified locations. Follow the instructions below to convert document text into named destinations. All instances of the specified text will be turned into a separate named destination. Further information on named destinations is available here.
1. Click the Bookmarks tab.
2. Click Convert to Named Destinations.
3. Follow the instructions detailed here.
|
Named destinations are user-defined locations in documents that operate in a similar manner to bookmarks, with the difference that they remain constant when pages are moved or deleted. They can be used in conjunction with Bookmarks, Go To Page actions and the /Open command line to navigate to specified locations. Follow the instructions below to create named destinations:
1. Move to the desired new named destination location.
2. Click the View tab, then click the Panes dropdown menu and click Destinations. The Named Destinations pane will open.
3. Click the New Destination button. A new entry will appear in the Named Destinations pane. Further information on named destinations is available here.
|
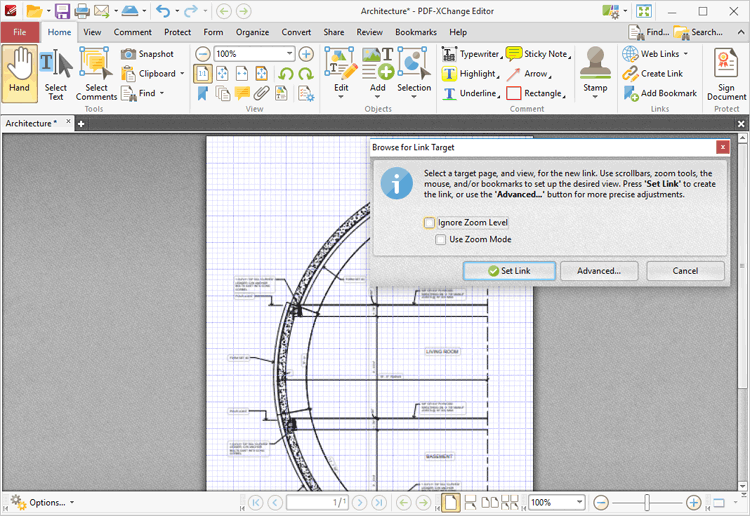
1. Click the Home tab, then click Create Link.
2. Click and drag the pointer to determine the size and location of the link. The Browse for Link Target dialog box will open:
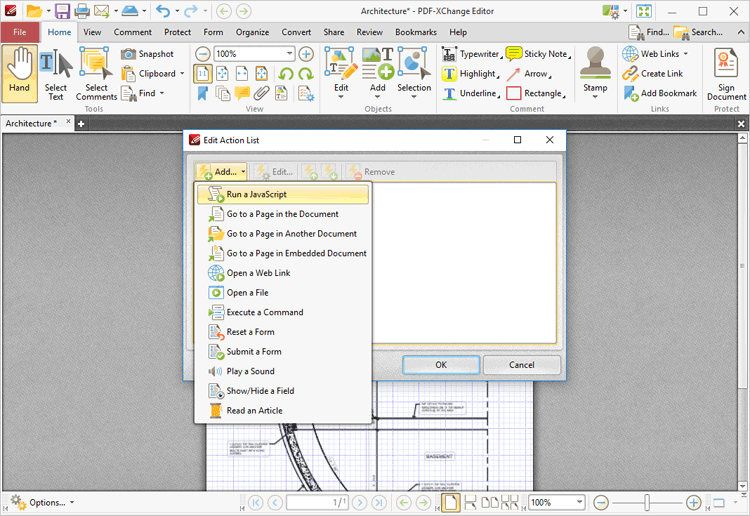
3. Click Advanced. The Edit Action List dialog box will open and the Add dropdown menu will be expanded:
4. Click Run a JavaScript. The Add Action: "Run a JavaScript" dialog box will open. Enter the desired JavaScript and click OK to create the JavaScript link.
|
1. Click the File tab, then click Document Properties. The Document Properties dialog box will open.
2. Click JavaScript in the Categories menu.
3. Select the desired JavaScript and click Delete.
|
1. Click the Organize tab.
2. Click Duplicate Pages. The Duplicate Pages dialog box will open.
3. Follow the instructions detailed here.
|
1. Click the File tab, then click Document Properties. The Document Properties dialog box will open.
2. Click JavaScript in the Categories menu.
3. Select the desired JavaScript and click Edit. The JavaScript Editor dialog box will open.
4. Edit the JavaScript as desired and click OK to save.
The keyboard shortcut for this operation is Ctrl+J.
|
This feature emails documents directly from PDF-XChange Editor. It uses the mailing parameters defined in the Send Mail section of the Preferences settings, which can be determined here. Follow the instructions below to email documents:
1. Click the Send by E-Mail icon in the Quick Access Toolbar, which is located in the upper-left section of the user interface. The default email client will open.
2. Enter the name of the recipient and send the email.
Further information on email preferences is available here.
|
This feature is used to specify that the line widths and coordinates of strokes are adjusted automatically to produce strokes of uniform thickness. This is performed in order to compensate for the effects of rasterization and fit lines (and other figures) more precisely to the pixel grid of monitors and other displays.
1. Click the File tab, then click Preferences. The Preferences dialog box will open.
2. Click Page Display in the Categories menu.
3. Click the Rendering button, then use the Stroke Adjust dropdown menu to enable/disable stroke adjust as desired.
Further information on this feature is available here.
|
This feature is used to enhance the quality of scanned pages:
1. Click the Convert tab.
2. Click Enhance Scanned Pages.
3. Follow the instructions detailed here.
|
This feature copies and exports content selected in the current document to a new document:
1. Click the Home tab, then click Edit Content.
2. Click and drag to select content, then right-click the selection and click New Document from Selection in the shortcut menu.
|
This feature exports content selected in the current document to a new stamp that can be used in conjunction with the Stamp Tool:
1. Click the Home tab, then click Edit Content:
2. Click and drag to select content, then right-click the selection and click New Stamp from Selection in the shortcut menu.
Note that if multiple items are selected then a stamp will be created for each item.
|
This feature makes it possible to save and export customized settings for subsequent use:
1. Click the File tab.
2. Click Manage Settings, then click Export Settings. The Export Settings Options dialog box will open.
3. Determine parameters as detailed here.
4. Click OK.
|
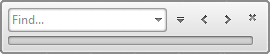
1. Click the Find icon in the Quick Find toolbar, which is located in the upper-right section of the user interface. The Find Function will launch:
2. Follow the instructions detailed here.
The keyboard shortcut for this operation is Ctrl+F.
|
This feature is used to import customized settings that have been saved using the Export Settings feature. Follow the instructions below to import settings:
1. Click the File tab, then click Manage Settings.
2. Click Import Settings. The Import Settings from File dialog box will open.
3. Select the desired settings for import and click OK.
|
This feature is used to insert images into areas that the Snapshot tool has defined:
1. Click Snapshot Tool in the Home tab.
2. Click and drag to define a snapshot area.
3. Right-click the snapshot area, then click Add Image in the shortcut menu.
The Open Files dialog box will open.
4. Select the desired image and click Open.
|
The JavaScript Console is used to add, edit and remove JavaScript from documents. Follow the instructions below to launch the JavaScript Console:
1. Click the Form tab.
2. Click JavaScript Console. Further information on the JavaScript Console is available here.
The keyboard shortcut for this operation is Ctrl+J.
|
The Merge Pages feature is used to merge document pages:
1. Click the Organize tab.
2. Click Merge Pages.
3. Follow the instructions detailed here.
|
1. Click the File tab.
2. Click Print. The Print dialog box will open. Set the desired printing parameters as detailed here.
3. Click Print.
The keyboard shortcut for this operation is Ctrl+P.
|
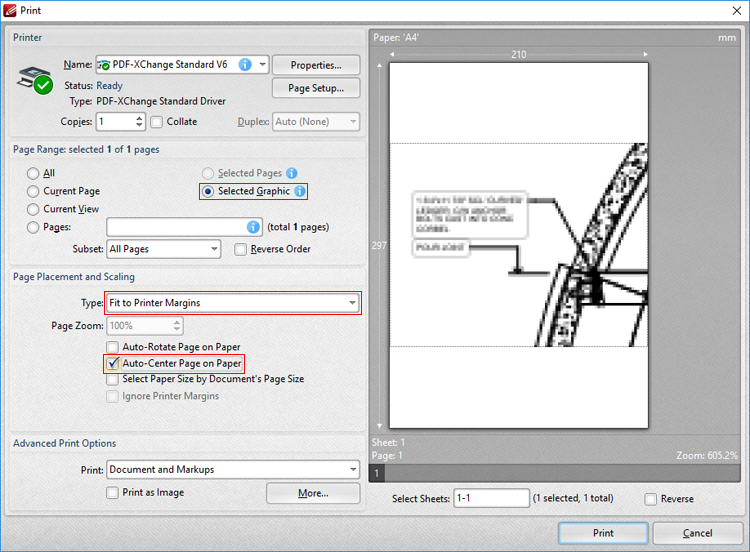
1. Click the Home tab, then click Snapshot and take the desired snapshot.
2. Click the File tab, then click Print. The Print dialog box will open.
3. Select Selected Graphic in the Page Range Section, and Fit to Printer Margins and Auto-Center Page on Paper in the Page Placement and Scaling section:
4. Click Print.
|
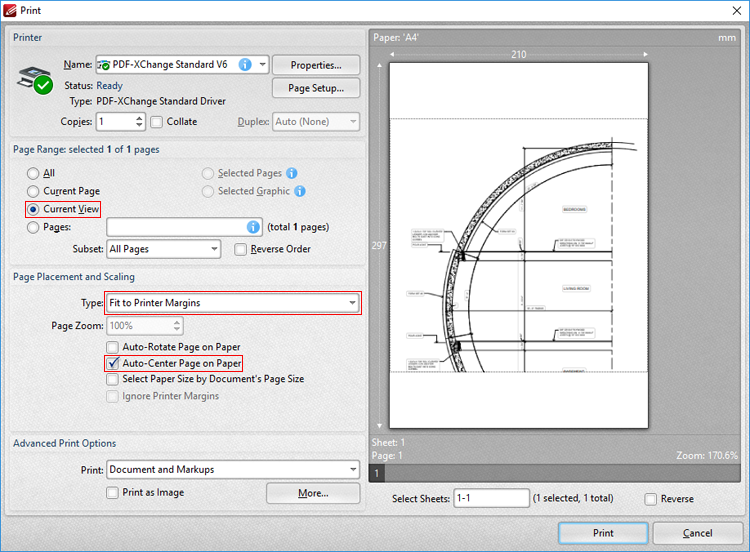
1. Click the File tab.
2. Click Print. The Print dialog box will open.
3. Select Current View in the Page Range Section, and Fit to Printer Margins and Auto-Center Page on Paper in the Page Placement and Scaling section:
4. Click Print.
|
This feature is used to replace images in PDF files:
1. Click the Home tab, then click Edit Content.
2. Right-click the image and then click Replace Image in the shortcut menu.
The Open Files dialog box will open.
3. Select the desired image and then click Open to replace the image selected in the document.
|
This feature resets document settings as desired. Settings that can be reset are program options, including common options, presets, trusted/untrusted lists, prompts and the UI language, as well as the program history, custom stamp collections and digital signature appearance templates. Follow the instructions below to reset document settings:
1. Click the File tab.
2. Click Manage Settings, then click Reset Settings. The Reset Settings Options dialog box will open.
3. Follow the instructions detailed here.
|
1. Click the File tab.
2. Click Revert.
|
This feature is used to save images directly from a PDF to a new file:
1. Click the Home tab, then click Edit Content.
2. Right-click the image and then click Save Image As in the shortcut menu.
|
1. Click Search in the Quick Find toolbar, which is located in the upper-right section of the user interface. The Search pane will open.
2. Follow the instructions detailed here.
The keyboard shortcut to launch the Search pane is Ctrl+Alt+F.
|
1. Click the Organize tab.
2. Click Swap Pages. The Swap Pages dialog box will open.
3. Enter the page numbers of the pages to be swapped and click OK.
|
The Snapshot Tool is a quick and efficient method of creating images of the current view within PDF-XChange Editor and pasting them immediately to the clipboard of the local computer. Follow the instructions below to enable and use the Snapshot Tool:
1. Click the Home tab.
2. Click the Other Tools dropdown menu, then click Snapshot Tool.
3. Click or click and drag to take snapshots.
Customizable parameters for this tool are detailed here.
|
This feature is used to edit the position, size and/or rotation of selected annotations/content items:
1. Click the Home tab, then click the Edit Content Tool.
2. Click and drag to determine the content to be transformed.
3. Click Selection, then click Transform.
4. Follow the instructions detailed here.
|
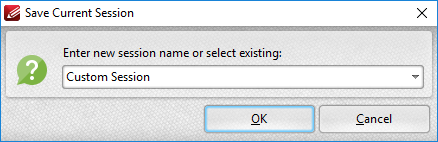
The Sessions options in PDF-XChange Editor provide a useful method of retaining the parameters of the active session for subsequent use. The retained parameters include which documents were open, their order/layout within the main window, the location of the main window on the screen and the status of editing panes such as the Thumbnails/Properties pane. Follow the instructions below to:
|
1. Click the File tab.
2. Click Document Properties. The Document Properties dialog box will open.
3. Click Fonts in the Categories Menu. A list of fonts used in the active document will be displayed. Please note that this information is read-only. See here for instructions on how to customize font embedding options.
|