 Export PDF to Microsoft Powerpoint Presentation
The Export PDF to Microsoft Powerpoint Presentation action copies PDF documents and converts them to Microsoft Powerpoint Presentation (*.pptx) format. Please note that it is necessary to have Microsoft Office installed on the local computer for this action to operate. It contains the following customizable parameters:
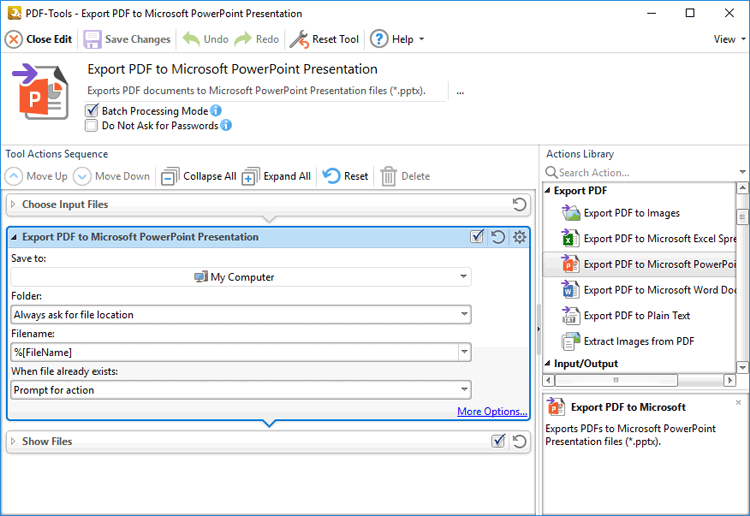
Figure 1. Export PDF to Microsoft Powerpoint Presentation Action Options
•Use the Save to dropdown menu to determine where output files are saved:
•Click My Computer to save files to the local computer.
•Hover over Add Place to add a new place at which to save files, then click Box.com, Dropbox, Google Drive, OneDrive or Sharepoint to add accounts from these locations. PDF-Tools will prompt for the login information for the selected account. When this information has been entered, the account will be detailed in the list and can be used to save files as desired.
•Use the Folder dropdown menu to determine where converted files are saved:
•Always ask for file location prompts the user to select a location each time the action is used.
•Use source folder as destination uses the source folder of input files as the save location.
•Use custom folder specified enables the user to specify a folder. If this option is used then the folder location must be specified in the text box beneath the dropdown menu.
•Use the Filename text box to name output files. The default name is defined by the macro %[Filename], which uses the name of the source file. Click the dropdown arrow to add additional macros.
•Use the When File Already Exists dropdown menu to determine the action taken when filenames are already in use:
•Prompt for action prompts the user for an action to take.
•Overwrite with a new file overwrites the existing file with the new file.
•Keep existing file unchanged retains the existing file and does not save the new file.
•Save new with other unique name inserts a prefix to the filename and then saves the new file.
•Click More Options for further options:
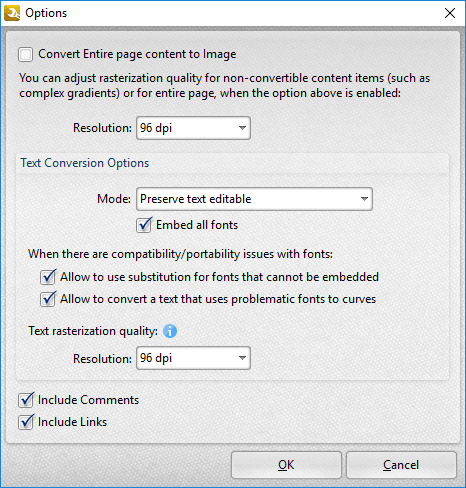
Figure 2. Options Dialog Box
•Select the Convert Entire page content to image box to convert all page content into image format in output documents.
•Use the Resolution dropdown menu to determine the resolution of output documents.
•Use the Text Conversion Options determine how text is converted:
•Use the Mode dropdown menu to determine the text conversion mode:
•Select Preserve text editable to preserve the existing format of text and retain the option of editing text in output documents.
•Select Convert to curves to convert text into vector curves. Please note that curves cannot be edited.
•Select Convert to images to convert text into image format.
•Select the Embed all fonts box to embed all fonts in converted documents. (This increases the file size but ensures compatibility on all machines).
•Select the Allow to use substitution for fonts that cannot be embedded box to enable the use of substitute fonts in cases where fonts cannot be embedded.
•Select the Allow to convert a text that uses problematic fonts to curves box to enable the conversion of problematic fonts into curves.
•Use the Resolution dropdown menu to determine the rasterization resolution of converted text. Text will be rasterized in cases where it cannot be converted with the specified Text Conversion Options.
•Select the Include Comments and/or Include Links boxes to include comments and/or links when files are converted.
Click OK to save changes.