 Editing Document Pages
PDF-XChange Editor features advanced content editing. The options detailed below facilitate the convenient and efficient editing of PDF documents. However, there is an important distinction to make when using PDF-XChange Editor to edit PDF documents. This is because documents are composed of two layers. The first layer consists of the original PDF content, such as text and/or images. The second layer, which goes over the first, consists of comments and/or markups added to the document using the software. These layers exist and operate independently of each other. This means that editing commands applied to original PDF content/comments and markups will apply only in relation to the layer in which selected items are located. When comments and markups are flattened they are moved to the same layer as original PDF content and can then be edited simultaneously. The menu detailed here can be used to flatten comments.
The Edit Documents page contains comprehensive, step-by-step instructions on how to edit documents. Additionally, many of the operations detailed below feature convenient keyboard shortcuts. See here for a comprehensive list of available shortcuts.
The following tools are available in PDF-XChange Editor for editing pages:
•The Edit Content Tool is used to select/edit original document content such as images and text. See below for further information.
•The Add Text Tool is used to add text to original document content.
•The Edit Form Tool is used to select/edit forms that it has been used to create, and can also be used to select/edit comments and markups created using the software.
•The Edit Comments Tool is used to select/edit comments and markups that users have added to documents.
These tools can be selected in the Shortcut Toolbar:

Figure 1. Shortcut Toolbar, Editing Tools Highlighted
Please note that the Content pane provides several simple and effective methods to summarize, view and edit page content.
The Edit Content Tool is used to edit existing PDF content. When it is selected the active document is divided into editable content items based on the images and text it contains. Click to select content items. (Alternatively, click and drag the pointer to specify an area as opposed to a content item. All content items within the area will then be selected and updated simultaneously). Selected items appear as below:
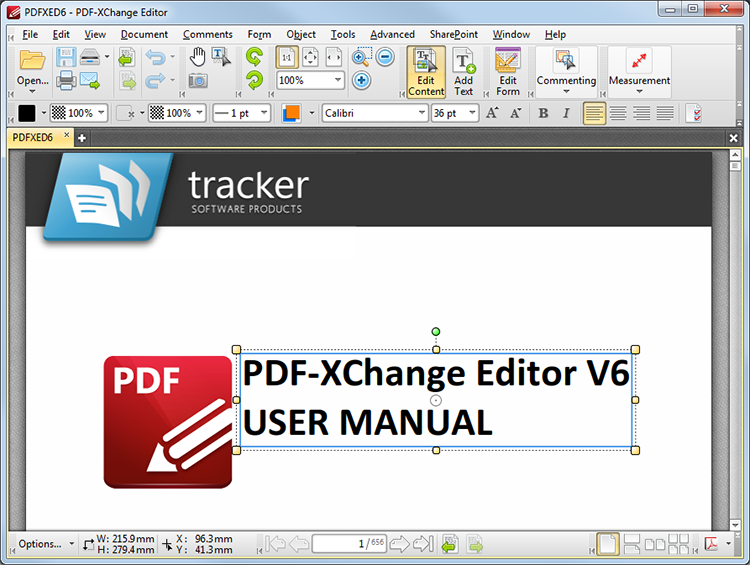
Figure 2. Selected Content Item
•Click and drag the yellow control points to resize content.
•Click and drag the circle at the center to reposition content.
•Click and drag the green control point at the top to rotate content items. Hold down Shift to rotate at increments of fifteen degrees.
•Use the arrow keys to reposition content.
•Use the editing aids detailed here to assist in the precise placement of document content.
•The main properties of selected content items are detailed in the Properties Toolbar and can be edited as desired. Available properties depend on the format of selected content.
•Click Properties in the Properties Toolbar to open the Properties pane and view/edit further properties.
•Right-click selected content for further options. Available options depend on the format of selected content. The menu below contains all options:

Figure 3. Right-Click Options Menu
•Hover over Edit Image Using to edit selected images in third-party applications:
•Click Default Application to edit images in the default application for editing images.
•Click Open With to select a program with which to edit images.
•Select Ignore Transformations When Editing Image to edit images as they appeared when they were first placed in the document.
•Click Add Bookmark to add a bookmark at the selected location. See here for further information.
•Click Add Sticky Note to add a sticky note at the selected location. See here for further information.
•Click Add Link to add a link to an external source from the selected object. See here for further information.
•Click Hand Tool, Snapshot Tool or Select Text Tool to enable these tools. See here for further information.
•Click Zoom Tool to enable the Zoom Tool.
•Click Cut, Copy, Paste or Delete to perform these operations on selected content.
•Hover over Order to determine how content appears in relation to overlapping content:
•Select Bring to Front to bring content to the front in cases of multiple objects overlapping.
•Select Send to Back to send content to the back in cases of multiple objects overlapping.
•Select Bring Forward to bring content to the front in cases of two objects overlapping.
•Select Send Backward to send content to the back in cases of two objects overlapping.
•Hover over Select to select specific document elements:
•Click All to select all content items.
•Click Text to select all document text.
•Click Images to select all document images.
•Click Shapes to select all document shapes.
•Click Deselect to deselect the content item currently selected.
•Use the Go To options to move to specific document pages, or to move between documents when multiple documents are open.
•Click Print to print the active document. The Print dialog box will open. See here for further information.
•Click Find to launch the find text function. See here for further information.
•Click Search to launch the Search function. See here for further information.
•Click Properties to open the Properties pane. See here for further information.
If selected content contains text then click to enable text editing. Right-click when editing text to launch the following menu:
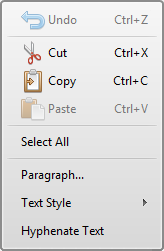
Figure 4. Editing Options
• Click Undo to reverse the most recent action.
• Click Cut to remove selected text and copy it to the clipboard.
• Click Copy to copy the selected text to the clipboard.
• Click Paste to paste the clipboard text to the selected location.
• Click Select All to select the whole text from the chosen text box for editing.
• Click Paragraph to launch the Paragraph Options dialog box, which is explained in (figure 4) below.
• Click Text Style to determine text style options. The options are as follows:
•Bold
•Italic
•Underline
•Superscript, which transforms selected text into superscript that is used in special cases such as chemical compounds.
•Subscript, which transforms selected text into subscript that is used in special cases such as mathematical formulae.
•Clear Text Formatting, which clears any formatting that has taken place on selected text.
•Make Current Text format Default, which sets the format of selected text as the default text format for subsequent text.
•Apply Default Text Format, which applies the default text format to selected text.
•Select the Hyphenate Text option to automatically hyphenate text. This means that text will be hyphenated automatically when it reaches the margin.
•Please note that if the selection contains spelling mistakes then alternatives will be offered automatically in this menu. Click alternatives to update the selection.
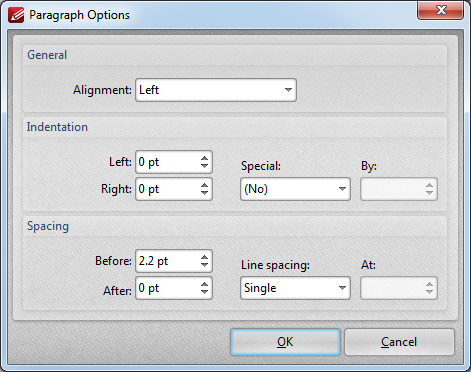
Figure 5. Paragraph Options
•Use the Alignment menu to determine the alignment of the paragraph.
•Use the Indentation number boxes to determine the indentation from the left and right margins.
•Use the Special and By menus to determine the Hanging options.
•Use the Spacing options to determine the line spacing.
Click OK to save settings.
Editing Forms
When the Edit Form button is selected in the Shortcut Toolbar, right-click documents to launch the following menu:
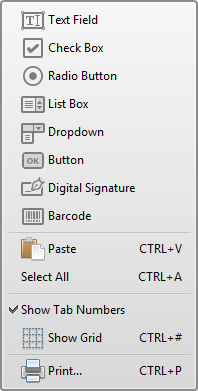
Figure 6. Right-Click Menu Options
•Click the options in the upper section of the menu to add interactive fields to documents. These are detailed here.
•Click Paste to paste the current clipboard content into the document.
•Click Select All to select all forms.
•Click Show Tab Numbers to display the tab numbers of forms. The order in which forms are created determine their tab number.
•Click Show Grid to display a grid beneath page content in order to facilitate the accurate alignment and editing of page content. Use the Measurement tab in the Preferences dialog box to determine grid settings and layout.
•Click Print to launch the Print dialog box, which determines print settings. These settings are explained here.
•The Forms Guide contains further information and step-by-step instructions about using forms.