 Document Properties
Click Document Properties to view and edit document properties:
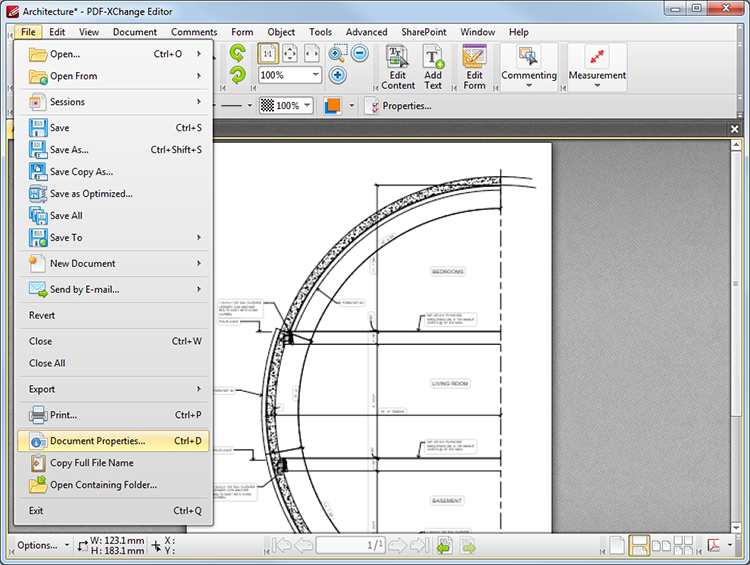
Figure 1. File Tab Submenu. Document Properties
The following dialog box will open:
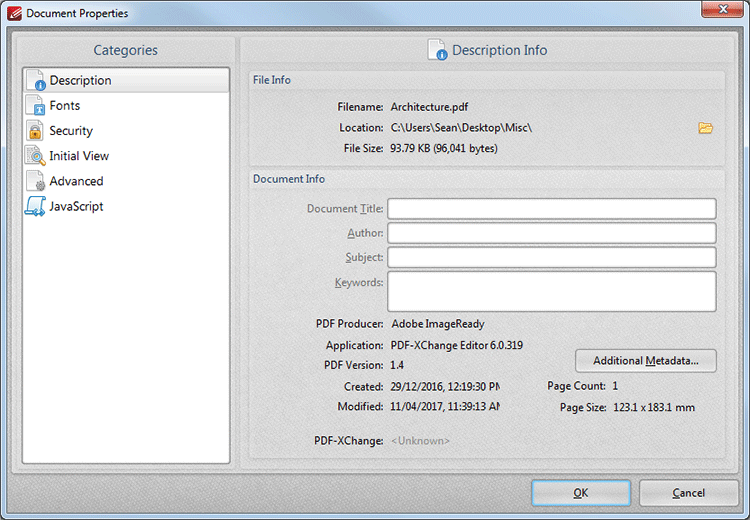
Figure 2. Document Properties Dialog Box. Description Option Selected
Please note that the keyboard shortcut Ctrl+D can also be used to launch this dialog box. Select an option from the Categories menu to adjust further parameters:
Description
This option shows details about the document currently selected:
•The File Info section contains information about the File name, location and size. Click the folder icon on the right to open the containing folder on the desktop.
•The Document Info section contains information about the Document Title, Author, Subject and Keywords. These can be edited using the adjacent text boxes. Further document details can be viewed beneath this section. Click the Additional Metadata button to view/edit additional document details:
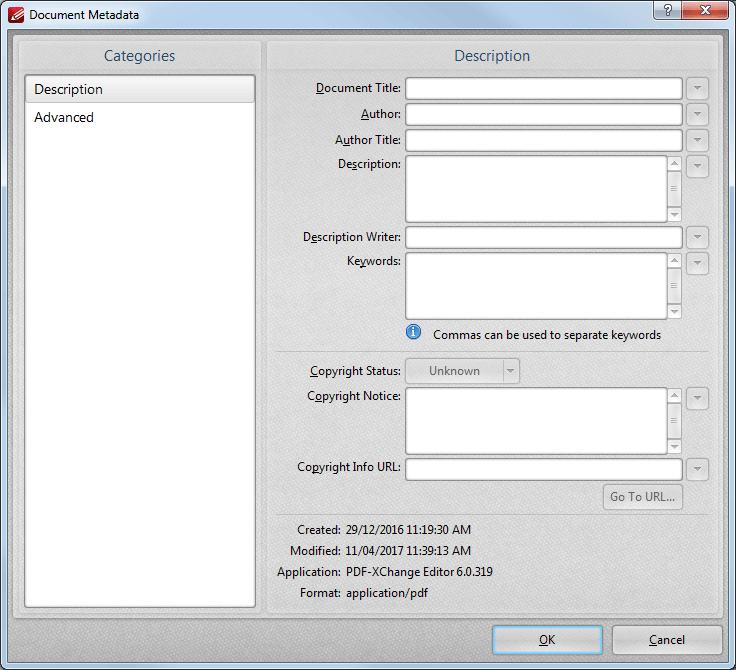
Figure 3. Document Metadata Dialog Box, Description Tab
Use the text boxes to view/edit document metadata. Click Advanced in the Categories menu to determine document metadata structure.
Fonts
This option shows details about fonts used within the document. The information displayed is read-only. The Save as Optimized settings can be used to customize font embedding options.
This option shows details about the security of the document. When it is selected the following dialog box opens:
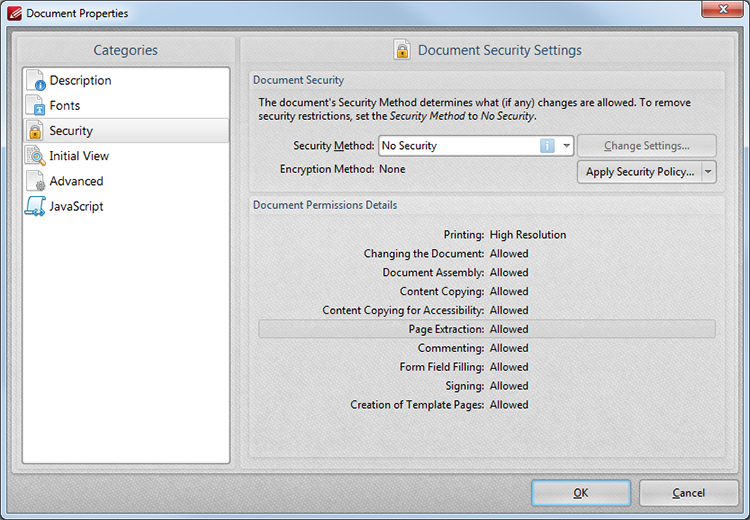
Figure 4. Document Properties Dialog Box. Security Option Selected
•Use the Security Method menu to select the type of security used in the document:
•No Security is the default setting, which means subsequent users have no restrictions on editing the document. This option should also be used when removing security from documents.
•Password Security enables document encryption, passwords and permissions. When it is selected the dialog box in (figure 5) will open.
•The Certificate Security option is available only when documents feature certificate security.
•The FileOpen option is available only when documents feature FileOpen security.
•Click the Apply Security Policy button to apply a new security policy or clone/edit existing policies.
•Additional security options are available here.
When the desired security settings have been selected, click OK to save.
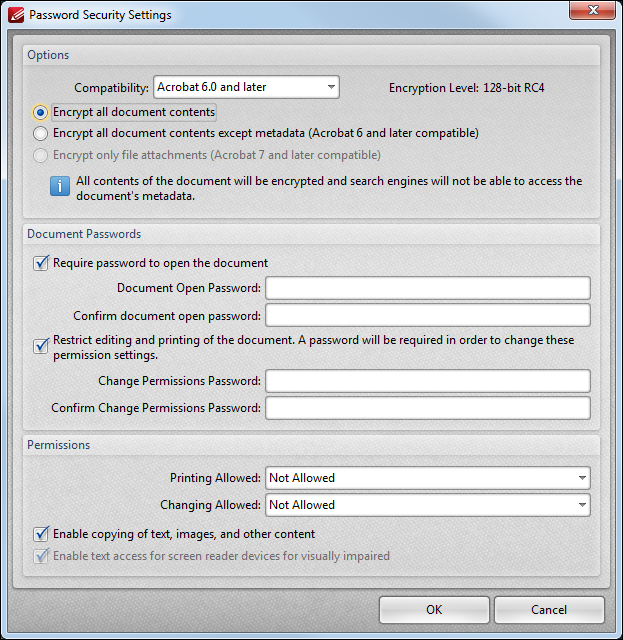
Figure 5. Password Security Settings
•Use the Compatibility menu to select the document security compatibility.
•Use the encryption option buttons to select the encryption settings.
•Select the Require password to open the document box to set a password for opening the document. Enter the password in the Document Open Password text box and confirm it in the text box below.
•Select the Restrict editing and printing of the document box to set a password for editing and printing the document. Enter the password in the Change Permissions Password text box and confirm it in the text box below. Use the menus in the Permissions section to select the settings that these passwords will enable.
Click OK to save settings.
This option determines the layout of files when they are opened. When it is selected the following dialog box will open:
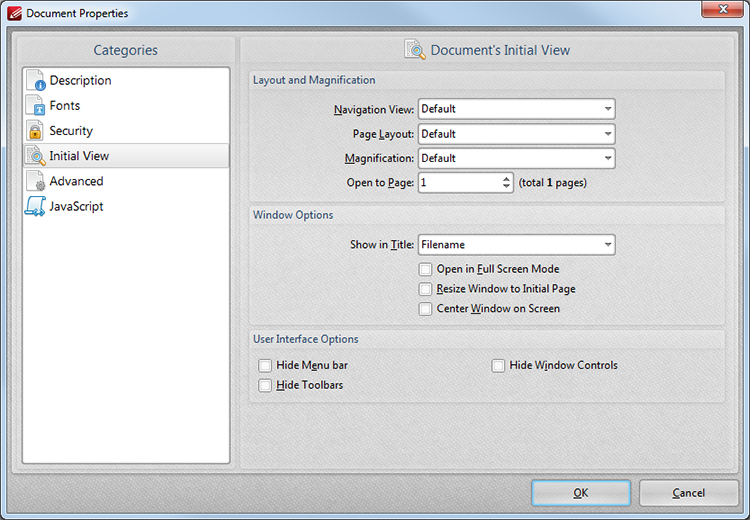
Figure 6. Document Properties Dialog Box. Initial View Option Selected
The Layout and Magnification settings are as follows:
•The Navigation View menu determines the panes that are visible when documents are opened:
•Select Default to retain the default settings of the application used to open documents.
•Select Page Only to view only the document itself.
•Select Bookmarks pane and page to view the document and the bookmarks pane.
•Select Thumbnails pane and page to view the document and the thumbnails pane.
•Select Layers pane and page to view the document and the layers pane.
•Select Attachments pane and page to view the document and the attachments pane.
•The Page Layout menu determines the page layout when documents are opened:
•Select Default to retain the default settings of the application used to open documents.
•Select Single Page to view a single page at a time.
•Select Continuous to view pages in a single, scrolling column.
•Select Two Pages Continuous to view two pages at a time in scrolling columns.
•Select Two Pages Continuous with Cover Page to view as above, but with a cover page included.
•Select Two Pages to view two pages at a time.
•Select Two Pages with Cover Page to view as above, but with a cover page included.
•The Magnification menu determines the level of zoom when documents are opened:
•Select Default to retain the default settings of the application used to open documents.
•Select Actual Size to view pages in their actual size. The resulting display will include resolution settings.
•Select Fit Page to view the full extent of page content regardless of its size.
•Select Fit Width to fit pages according to their width.
•Select Fit Height to fit pages according to their height.
•Select Fit Visible to view the entire page within the confines of the viewing area.
•Select an option from the list of numerical percentages to set the magnification at the same level.
•The Open to Page menu determines at which page documents open.
The Windows Options are as follows:
•Show in Title determines what is shown in the document tab when documents are opened. The options are File Name or Document Title.
•Select the Open in Full Screen Mode box to open documents in full screen mode. This option is dependent on the capabilities of the software being used.
•Select the Resize window to initial page box to resize the viewing window according to the dimensions of the first page of the document in question.
•Select the Center window on screen box to center the viewing window on the monitor screen.
The User Interface Options are as follows:
•Select the Hide Menu Bar box to hide the Menu Toolbar when documents are opened.
•Select the Hide Window Controls box to hide windows controls when documents are opened.
•Select the Hide Toolbars box to hide toolbars when documents are opened.
Click OK to save settings.
The Advanced document settings are as follows:
•The PDF Settings feature two parameters:
•Enter a URL in the Base URL text box to specify a base URL for weblinks in documents. The option is included to simplify the management of web links to an external website. If the URL to the external site changes then this setting can be used to avoid having to edit manually every link in documents that refer to the external site. (Please note that the base URL is not used if a link contains a complete URL address).
•The Trapped option determines trapping options with regard to printing. This is a complex process that aims to optimize the quality of printed documents. See here for further details.
•The Print Dialog Presets override the viewing application's default print settings with those specified within the file itself:
•There are two options for Page Scaling: Default retains the default settings. None disables page scaling.
•Duplex Mode determines the the default duplex mode for printing. Select an option from the menu.
•Select the Paper Size by document Page Size box to determine the paper size of the document using the size of the pages in the document.
•Enter the pages to be printed in the Print Page Range text box. See here for further information.
•The Number of Copies setting determines how many copies of the document are printed. Select an option from the menu.
•The Reading Options determine the direction of reading and language within the document:
•Binding features the options Left to Right and Right to Left. The option selected should be the same as the reading direction of the language selected in the Language setting.
•Language sets the language for the document.
•The Actions option determines when actions set within the document are executed:
•Before Document Close
•Before Document Saving
•After Document Saving
•Before Document Printing
•After Document Printing
•Use the Edit button to edit actions. See here for an explanation of available actions.
Click OK to save settings.
JavaScript
This option details active JavaScript in the current document. Use the Add, Edit and Delete buttons to modify javaScript. The JavaScript Console is detailed here.