 Customize Toolbars
Click Customize Toolbars to determine toolbar settings and create/edit customized toolbars:
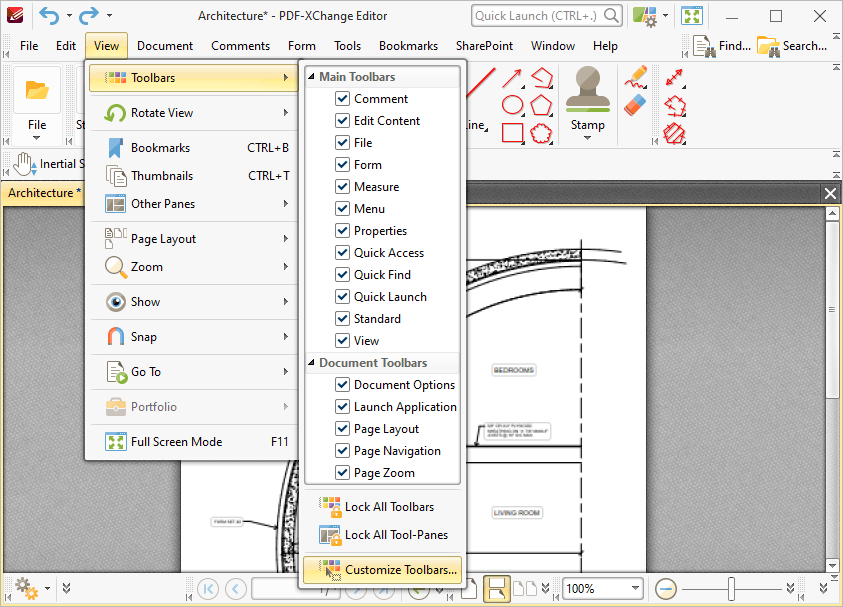
Figure 1. View Tab Submenu. Customize Toolbars
The Customize Toolbars dialog box will open:
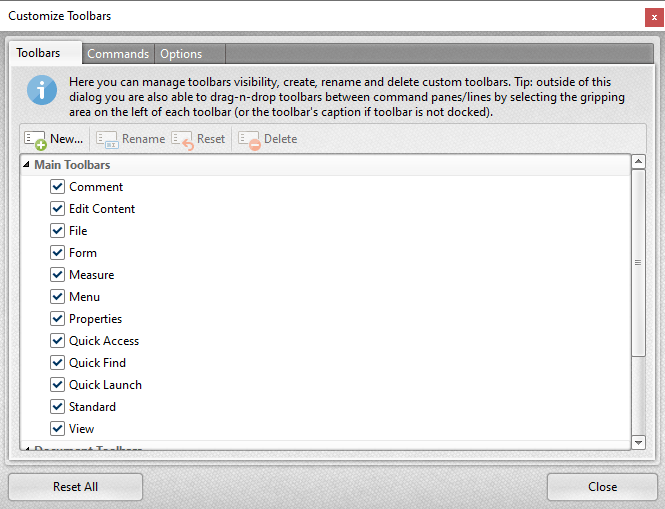
Figure 2. Customize Toolbars Dialog Box. Toolbars Tab Selected
All application toolbars are displayed in the Toolbars tab.
•Select/clear toolbar check boxes to show/hide toolbars in the main window.
•Click New to create new toolbars. The New Toolbar dialog box will open. Enter a title for the new toolbar and click OK. The new toolbar will appear on the left side of the Properties Toolbar, as detailed in (figure 5).
•Click Rename to rename selected toolbars. (Please note that this setting is intended for use with custom toolbars. The default application toolbars cannot be renamed).
•Click Reset to restore selected toolbars to their default settings.
•Click Delete to delete selected toolbars. (Please note that this setting is intended for use with custom toolbars. The default application toolbars cannot be deleted).
All the available commands in PDF-XChange Editor are contained in the Commands tab:
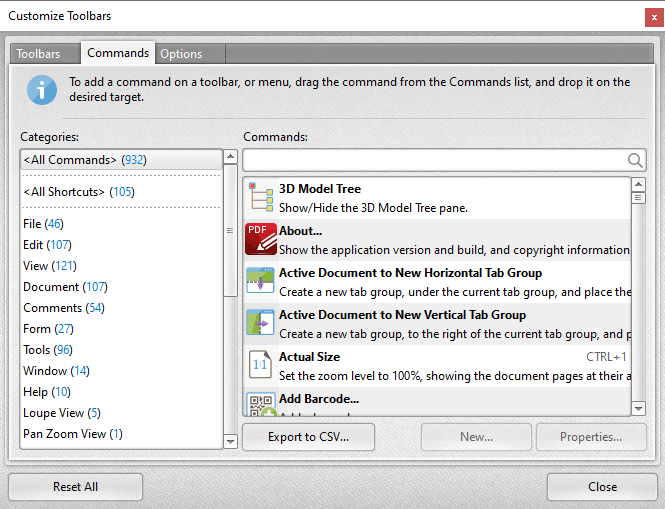
Figure 3. Customize Toolbars Dialog Box. Commands Tab Selected
•Use the Categories menu to determine the group of commands displayed in the viewing pane.
•Use the Commands text box to search for commands.
•Click and drag commands to the desired toolbar/submenu in the main window of PDF-XChange Editor.
•Click Properties to view/edit the properties/tooltip/keyboard shortcuts and other variables for selected commands.
•Click Export to CSV to export a list of all available commands to a comma-separated-values file.
•Please note that customized comment styles are available in the Custom Comment Styles category.
Click the Options tab to enable/disable further toolbar options:
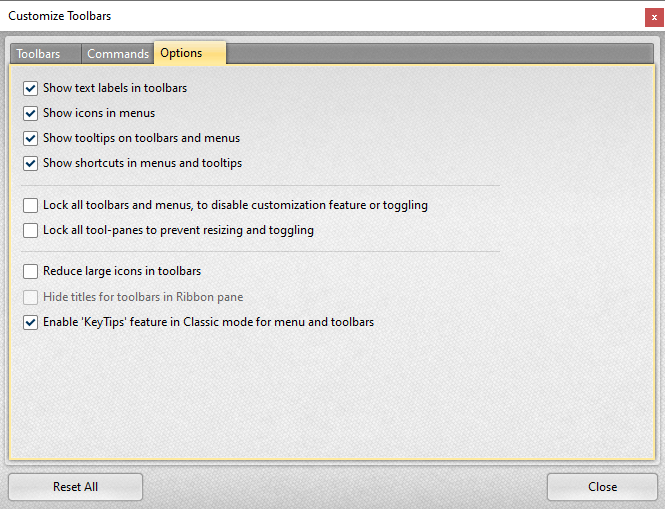
Figure 4. Customize Toolbar Options
New toolbars appear as below:
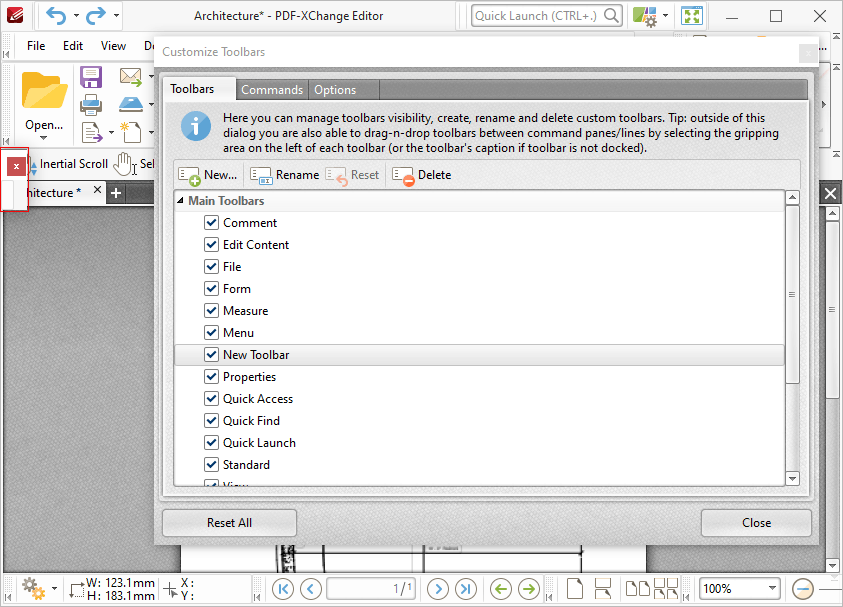
Figure 5. New Toolbar
Click and drag commands from the list of commands to add them to toolbars. A sample new toolbar is detailed below:

Figure 6. Sample Toolbar
This toolbar contains the following commands:
•Add Barcode
•Apply All Redactions
•Flatten Comments
•Oval Tool
•Show/Hide the Signatures Pane
Click to activate commands. Click and drag toolbars to change their location in the workspace. If toolbars are hovered over compatible areas in the workspace then the icon beneath the pointer will change. This indicates that the toolbar can be docked to the interface. Docked toolbars appear as below:
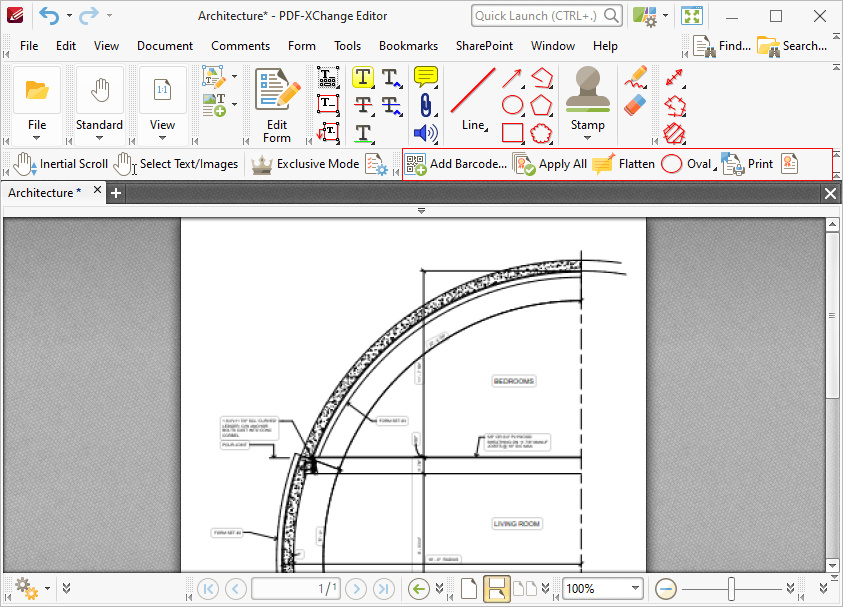
Figure 7. New Toolbar Docked to Main Window
Please note that additional options are available when the Customize Toolbars dialog box is open and toolbar items are right-clicked:
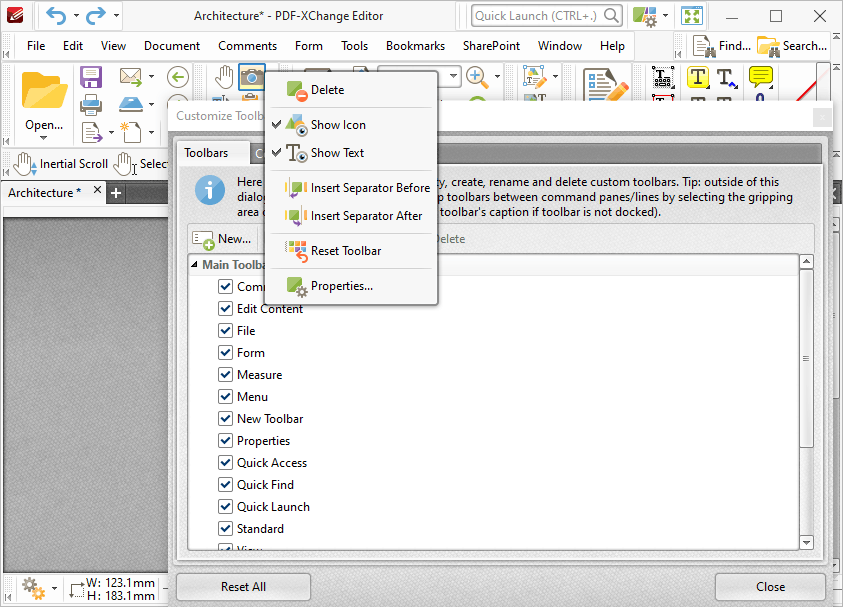
Figure 8. Shortcut Menu for Toolbar Items
•Click Delete to remove the selected item from the toolbar.
•Click Show Icon to show/hide the icon of the selected item.
•Click Show Text to show/hide the text for the selected item.
•Click Insert Separator Before/After to insert an item separator before/after the selected item. Separators are used to define areas in which toolbar items can be placed.
•Click Reset Toolbar to reset the selected toolbar.
•Click Properties to view/edit the properties of the selected item. Please note that properties are read-only, except for those that relate to the keyboard shortcut for the item. The process of creating/editing keyboard shortcuts is detailed here.