![]() Signatures
Signatures
The Signatures preferences are detailed below:
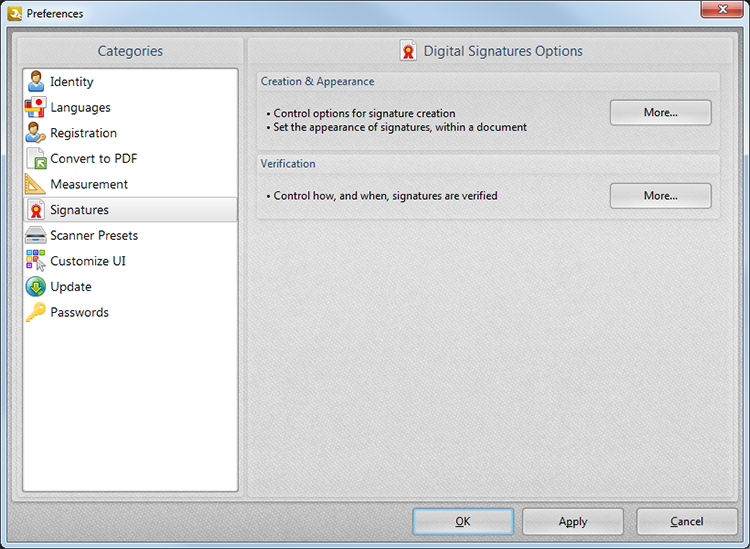
Figure 1. Preferences Dialog Box, Signatures Options
The Creation & Appearance options determine the default signing method/format and the physical appearance of digital signatures. Click More to view all options:
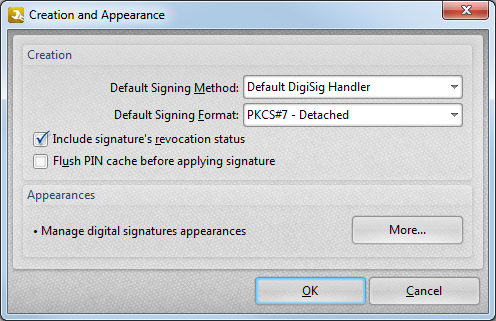
Figure 2. Creation and Appearance Dialog Box
•Use the dropdown menus to determine the default signing method/format.
•Select/clear the Include signature's revocation status box as desired.
•Select/clear the Flush PIN cache before applying signature box as desired.
•Click the More button to determine the physical appearance of digital signatures:
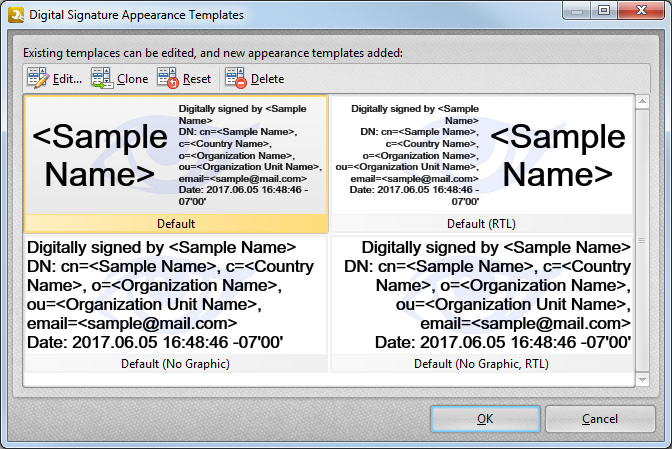
Figure 3. Digital Signature Appearance Templates Dialog Box
•The digital signature appearance templates are displayed for the Default, Default (RTL), Default (No Graphic) and Default (No Graphic, RTL) formats.
•Click Edit to edit selected templates. See (figure 4) below.
•Click Clone to clone selected templates and adjust settings without affecting the original template.
•Click Reset to reset selected templates to their default values.
•Click Delete to delete selected templates.
•Click OK to save changes.
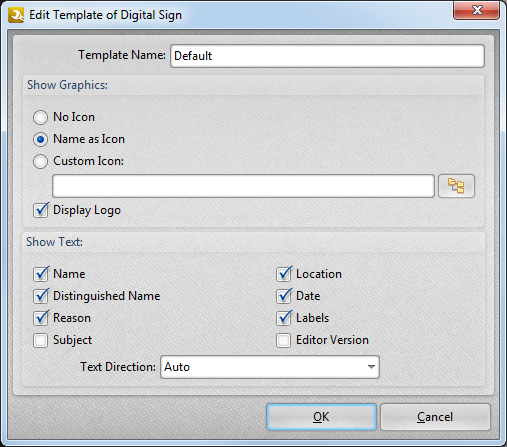
Figure 4. Edit Template of Digital Sign Dialog Box
•Use the Template Name dialog box to edit the name of the template.
•Select an option from the Show Graphics option buttons to determine the icon that the signature uses:
•Select No Icon to disable the icon.
•Select Name as Icon to use the name of the signature as the icon.
•Select Custom Icon to use a custom icon. Enter the custom icon name in the text box or click the folder icon to select a file.
•Use the Show Text options to determine details displayed in the signature text.
Click OK to save changes.