![]() Create Tool
Create Tool
The Create Tool feature of PDF-Tools enables the creation of custom tools. Follow the steps below to create tools:
1. Launch PDF-Tools:
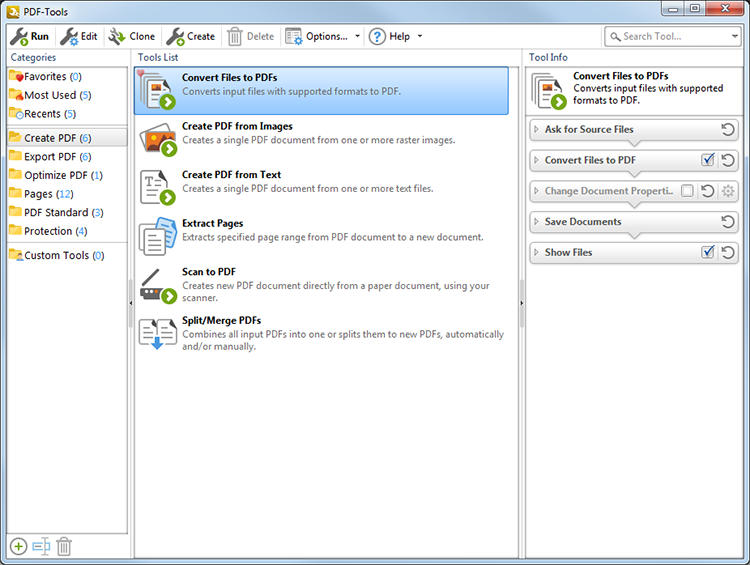
Figure 1. Main Window
2. Click ![]() Create in the main toolbar. The Edit Tools window will open:
Create in the main toolbar. The Edit Tools window will open:
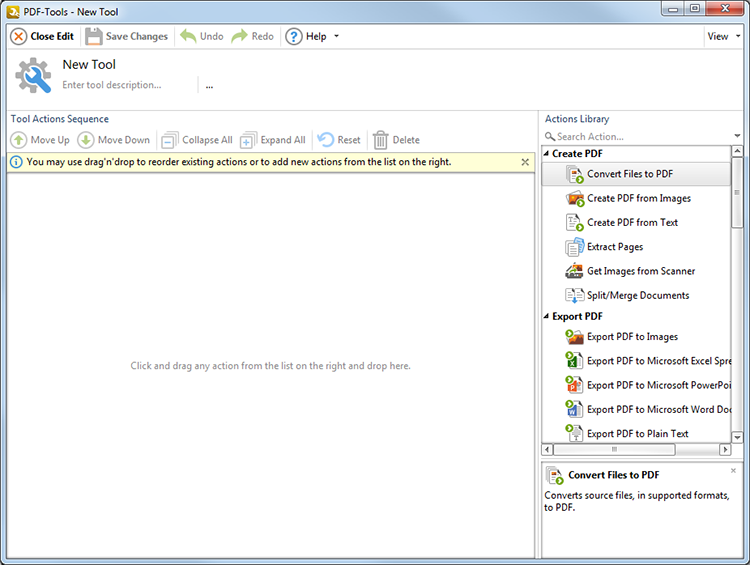
Figure 2. Edit Tools Window
3. Enter a name and description for the new tool. Click the ![]() icon to select an icon for tools. Please note that icons must be in the *.ico format.
icon to select an icon for tools. Please note that icons must be in the *.ico format.
Building the Tool Actions Sequence
All tools are composed of actions from the Actions Library. These actions make up the Tools Action Sequence, which determines the functionality of tools. Therefore it is necessary to add actions from the Actions Library to the Tool Actions Sequence in order to build tools. Please note:
•The Edit Tools window (figure 2) is explained here.
•There are forty-two available actions. See the Actions Library for an explanation of all actions and their associated parameters.
•Click the name/description of tools to edit these parameters.
•Double-click actions, or drag them from the Actions Library, to add them to the Tool Actions Sequence. The order of actions in the Tool Actions Sequence determines their order of operation when tools run.
•Several actions require additional actions in order to function correctly. Additional actions may be required before (prerequisite) or after (postrequisite) actions. For example the Convert Files to PDF action requires both an action that sources input files to convert to PDF and an action that saves converted files. If a mistake is made then a warning icon will appear. Click the icon for further information and a solution to the issue. See here for a comprehensive list of the prerequisites and postrequisites for each action.
•All tools require input files to operate, therefore it is necessary to begin the Tools Actions Sequence with either the Ask For Source Files or the Get Images from Scanner action.
•Almost all tools require files to be saved after they are created/converted, and in those cases either the Save Documents or the Save Images action must be included.
Example
This example will build a tool that creates a PDF document from text files, changes the document properties, adds a watermark and a digital signature, converts the document to PDF/A format and then saves it on the local computer. The following actions are required from the Actions Library in order to achieve these operations:
•Ask for Source Files
•Create PDF from Text
•Change Document Properties
•Add Watermarks
•Add Digital Signature
•Convert to PDF/A
•Save Documents
The first step is to select the option to create a new tool, as detailed above:
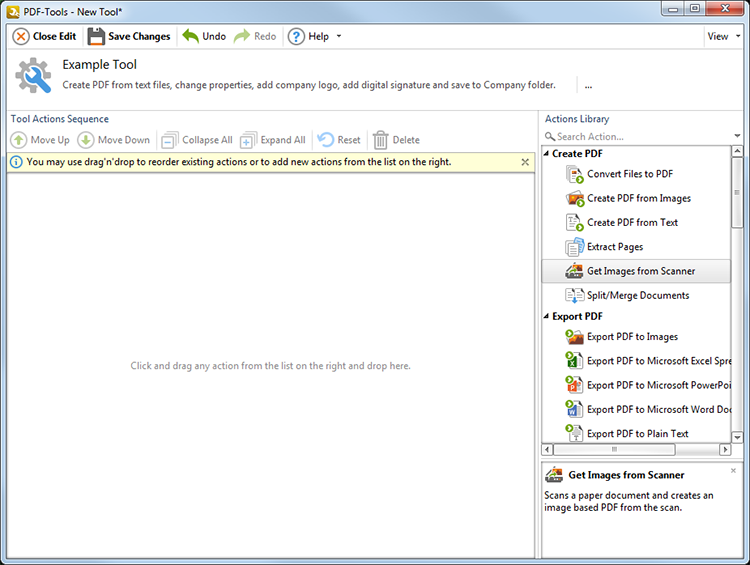
Figure 3. Edit Tools Window, Example Tool
The next step is to drag the desired actions from the Actions Library to the Tool Actions Sequence:

Figure 4. Edit Tools Window, Example Tool, Actions Added to Tool Actions Sequence
Please note:
•The the order of actions in the Tool Actions Sequence determines their order of operation when tools run.
•Click the ![]() icon to remove actions.
icon to remove actions.
•Use the ![]() icon on the left of action names to expand and customize action parameters. See the Actions Library for an explanation of all action parameters.
icon on the left of action names to expand and customize action parameters. See the Actions Library for an explanation of all action parameters.
•Click the ![]() icon to revert to default parameters after action parameters have been changed.
icon to revert to default parameters after action parameters have been changed.
•Actions that feature check boxes are optional. A selected box means actions are included in the Tool Actions Sequence when tools run. A cleared box means actions are retained in the Tool Actions Sequence but will be skipped when tools run. (This is useful when actions are required only some of the time).
•Click the tool icon at the top left of the window to select new icons. Please note that icons must be in the *.ico format.
Click Save Changes to save the custom tool, which will then be available in the folder that was open when the Create button was selected:
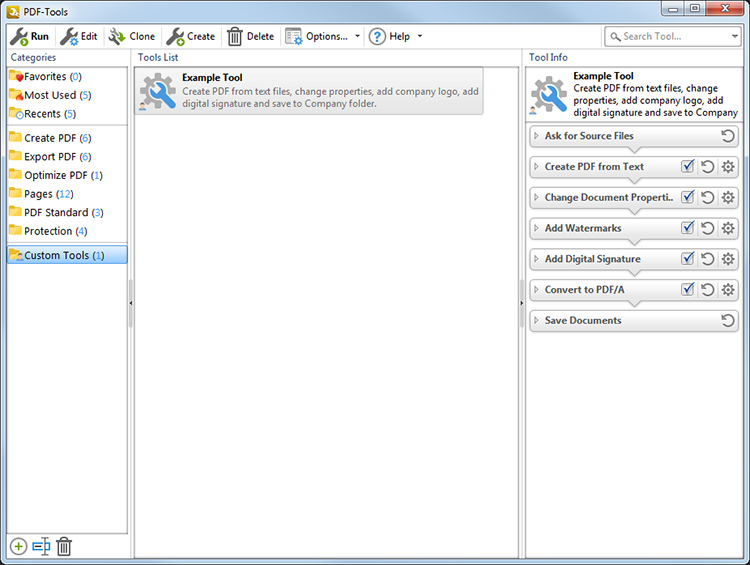
Figure 5. Main Window, Example Tool Complete
Double-click to launch the tool, or right-click for further options, as detailed here.